File size: 6,815 Bytes
6c9ac8f |
1 2 3 4 5 6 7 8 9 10 11 12 13 14 15 16 17 18 19 20 21 22 23 24 25 26 27 28 29 30 31 32 33 34 35 36 37 38 39 40 41 42 43 44 45 46 47 48 49 50 51 52 53 54 55 56 57 58 59 60 61 62 63 64 65 66 67 68 69 70 71 72 73 74 75 76 77 78 79 80 81 82 83 84 85 86 87 88 89 90 91 92 93 94 95 96 97 98 99 100 101 102 103 104 105 106 107 108 109 110 111 112 113 114 115 116 117 118 119 120 121 122 123 124 125 126 127 128 129 130 131 132 133 134 135 136 137 138 139 140 141 142 143 144 145 146 147 148 149 150 151 152 153 154 155 156 157 158 159 160 161 162 163 164 165 166 167 168 169 170 171 172 173 174 175 176 177 178 179 180 181 182 183 184 185 186 187 188 189 190 191 192 193 194 195 196 197 198 199 200 201 202 203 204 205 206 207 208 209 210 211 212 213 214 215 216 217 218 219 220 221 222 223 224 225 226 227 228 229 230 231 232 233 234 235 236 237 238 239 240 241 242 243 244 245 246 247 248 249 250 251 252 253 254 255 256 |
# 使用 MMDetection 和 Label-Studio 进行半自动化目标检测标注
标注数据是一个费时费力的任务,本文介绍了如何使用 MMDetection 中的 RTMDet 算法联合 Label-Studio 软件进行半自动化标注。具体来说,使用 RTMDet 预测图片生成标注,然后使用 Label-Studio 进行微调标注,社区用户可以参考此流程和方法,将其应用到其他领域。
- RTMDet:RTMDet 是 OpenMMLab 自研的高精度单阶段的目标检测算法,开源于 MMDetection 目标检测工具箱中,其开源协议为 Apache 2.0,工业界的用户可以不受限的免费使用。
- [Label Studio](https://github.com/heartexlabs/label-studio) 是一款优秀的标注软件,覆盖图像分类、目标检测、分割等领域数据集标注的功能。
本文将使用[喵喵数据集](https://download.openmmlab.com/mmyolo/data/cat_dataset.zip)的图片,进行半自动化标注。
## 环境配置
首先需要创建一个虚拟环境,然后安装 PyTorch 和 MMCV。在本文中,我们将指定 PyTorch 和 MMCV 的版本。接下来安装 MMDetection、Label-Studio 和 label-studio-ml-backend,具体步骤如下:
创建虚拟环境:
```shell
conda create -n rtmdet python=3.9 -y
conda activate rtmdet
```
安装 PyTorch
```shell
# Linux and Windows CPU only
pip install torch==1.10.1+cpu torchvision==0.11.2+cpu torchaudio==0.10.1 -f https://download.pytorch.org/whl/cpu/torch_stable.html
# Linux and Windows CUDA 11.3
pip install torch==1.10.1+cu113 torchvision==0.11.2+cu113 torchaudio==0.10.1 -f https://download.pytorch.org/whl/cu113/torch_stable.html
# OSX
pip install torch==1.10.1 torchvision==0.11.2 torchaudio==0.10.1
```
安装 MMCV
```shell
pip install -U openmim
mim install "mmcv>=2.0.0"
# 安装 mmcv 的过程中会自动安装 mmengine
```
安装 MMDetection
```shell
git clone https://github.com/open-mmlab/mmdetection
cd mmdetection
pip install -v -e .
```
安装 Label-Studio 和 label-studio-ml-backend
```shell
# 安装 label-studio 需要一段时间,如果找不到版本请使用官方源
pip install label-studio==1.7.2
pip install label-studio-ml==1.0.9
```
下载rtmdet权重
```shell
cd path/to/mmetection
mkdir work_dirs
cd work_dirs
wget https://download.openmmlab.com/mmdetection/v3.0/rtmdet/rtmdet_m_8xb32-300e_coco/rtmdet_m_8xb32-300e_coco_20220719_112220-229f527c.pth
```
## 启动服务
启动 RTMDet 后端推理服务:
```shell
cd path/to/mmetection
label-studio-ml start projects/LabelStudio/backend_template --with \
config_file=configs/rtmdet/rtmdet_m_8xb32-300e_coco.py \
checkpoint_file=./work_dirs/rtmdet_m_8xb32-300e_coco_20220719_112220-229f527c.pth \
device=cpu \
--port 8003
# device=cpu 为使用 CPU 推理,如果使用 GPU 推理,将 cpu 替换为 cuda:0
```

此时,RTMDet 后端推理服务已经启动,后续在 Label-Studio Web 系统中配置 http://localhost:8003 后端推理服务即可。
现在启动 Label-Studio 网页服务:
```shell
label-studio start
```

打开浏览器访问 [http://localhost:8080/](http://localhost:8080/) 即可看到 Label-Studio 的界面。

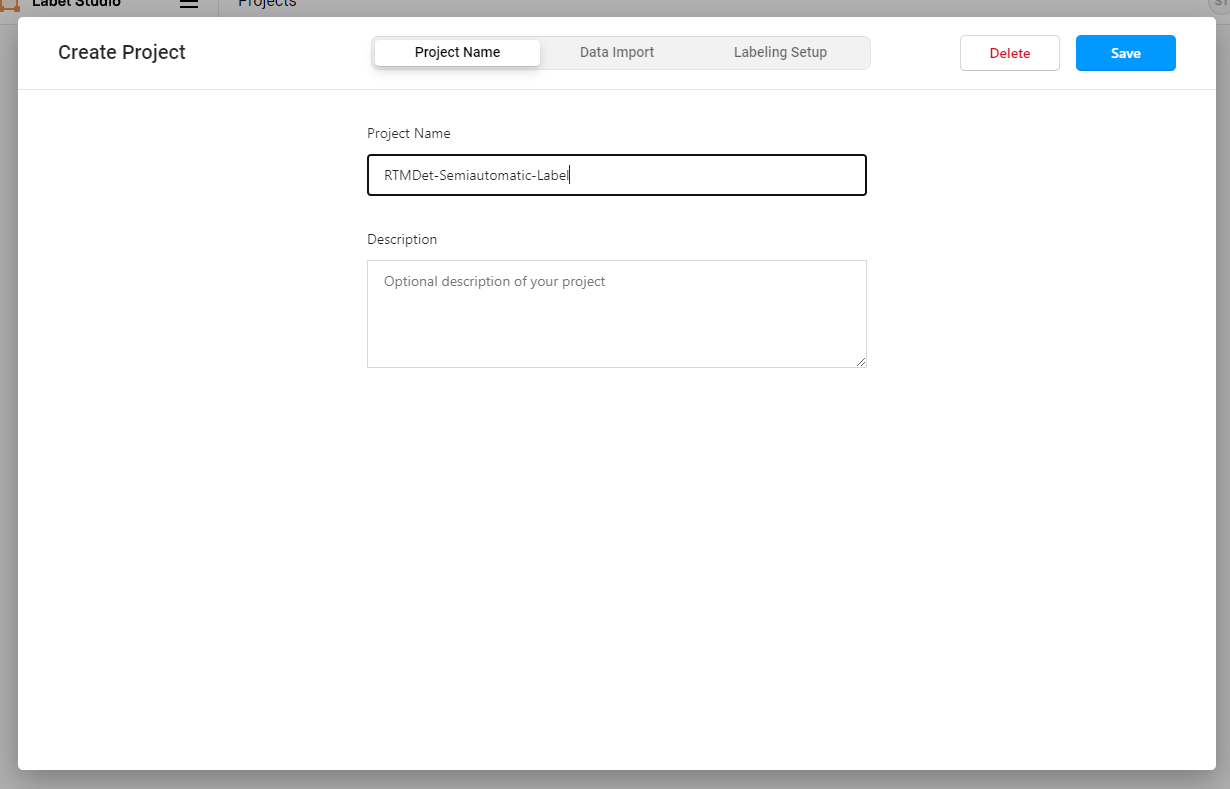
我们注册一个用户,然后创建一个 RTMDet-Semiautomatic-Label 项目。
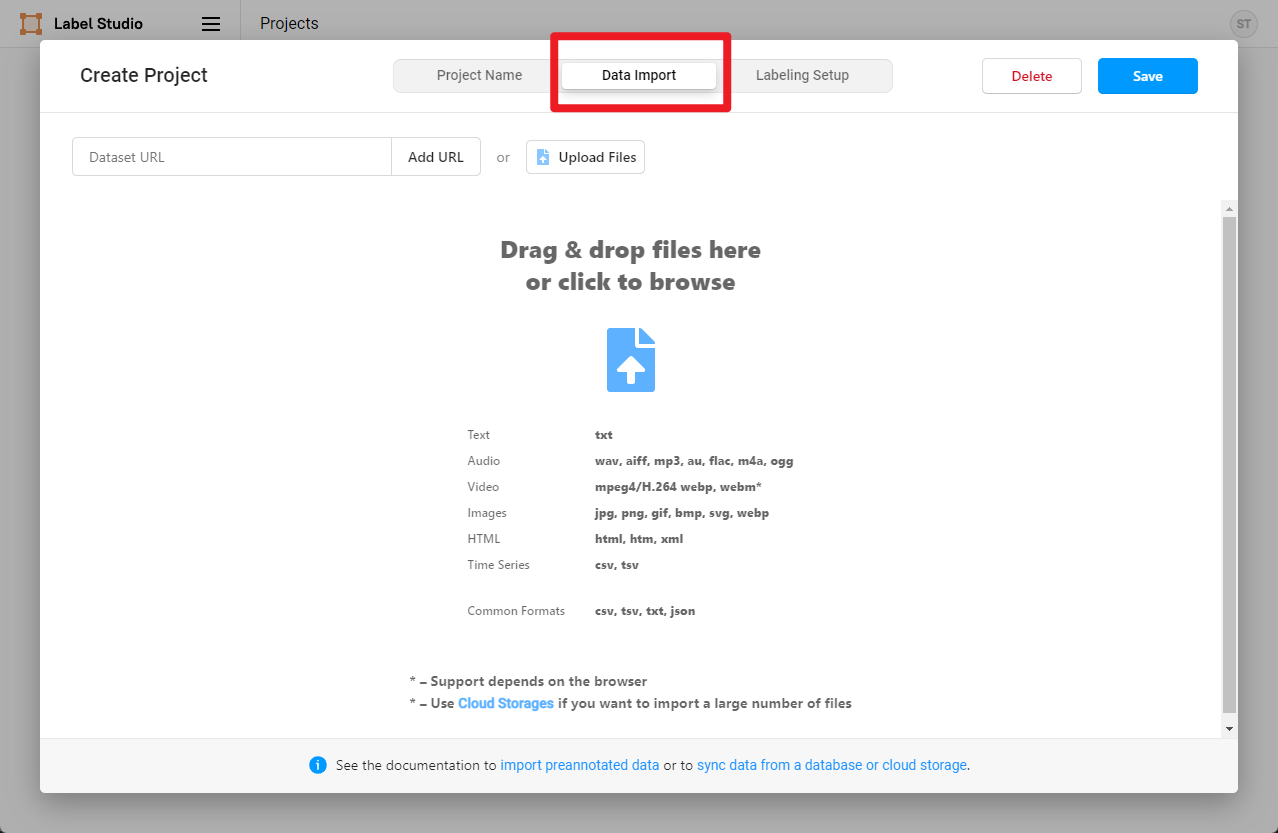
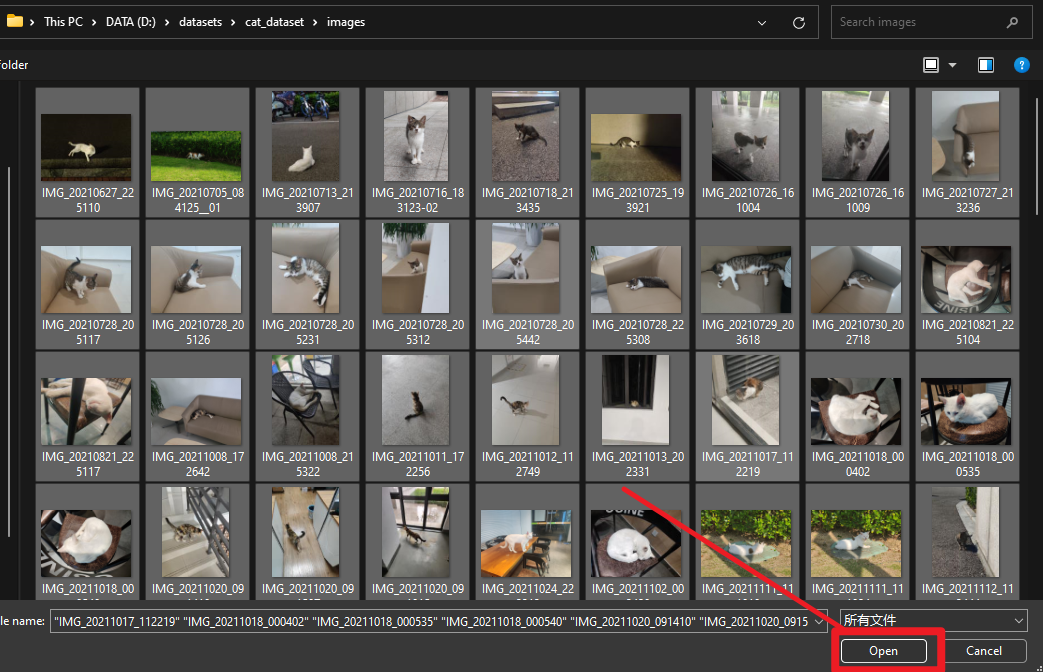
我们通过下面的方式下载好示例的喵喵图片,点击 Data Import 导入需要标注的猫图片。
```shell
cd path/to/mmetection
mkdir data && cd data
wget https://download.openmmlab.com/mmyolo/data/cat_dataset.zip && unzip cat_dataset.zip
```
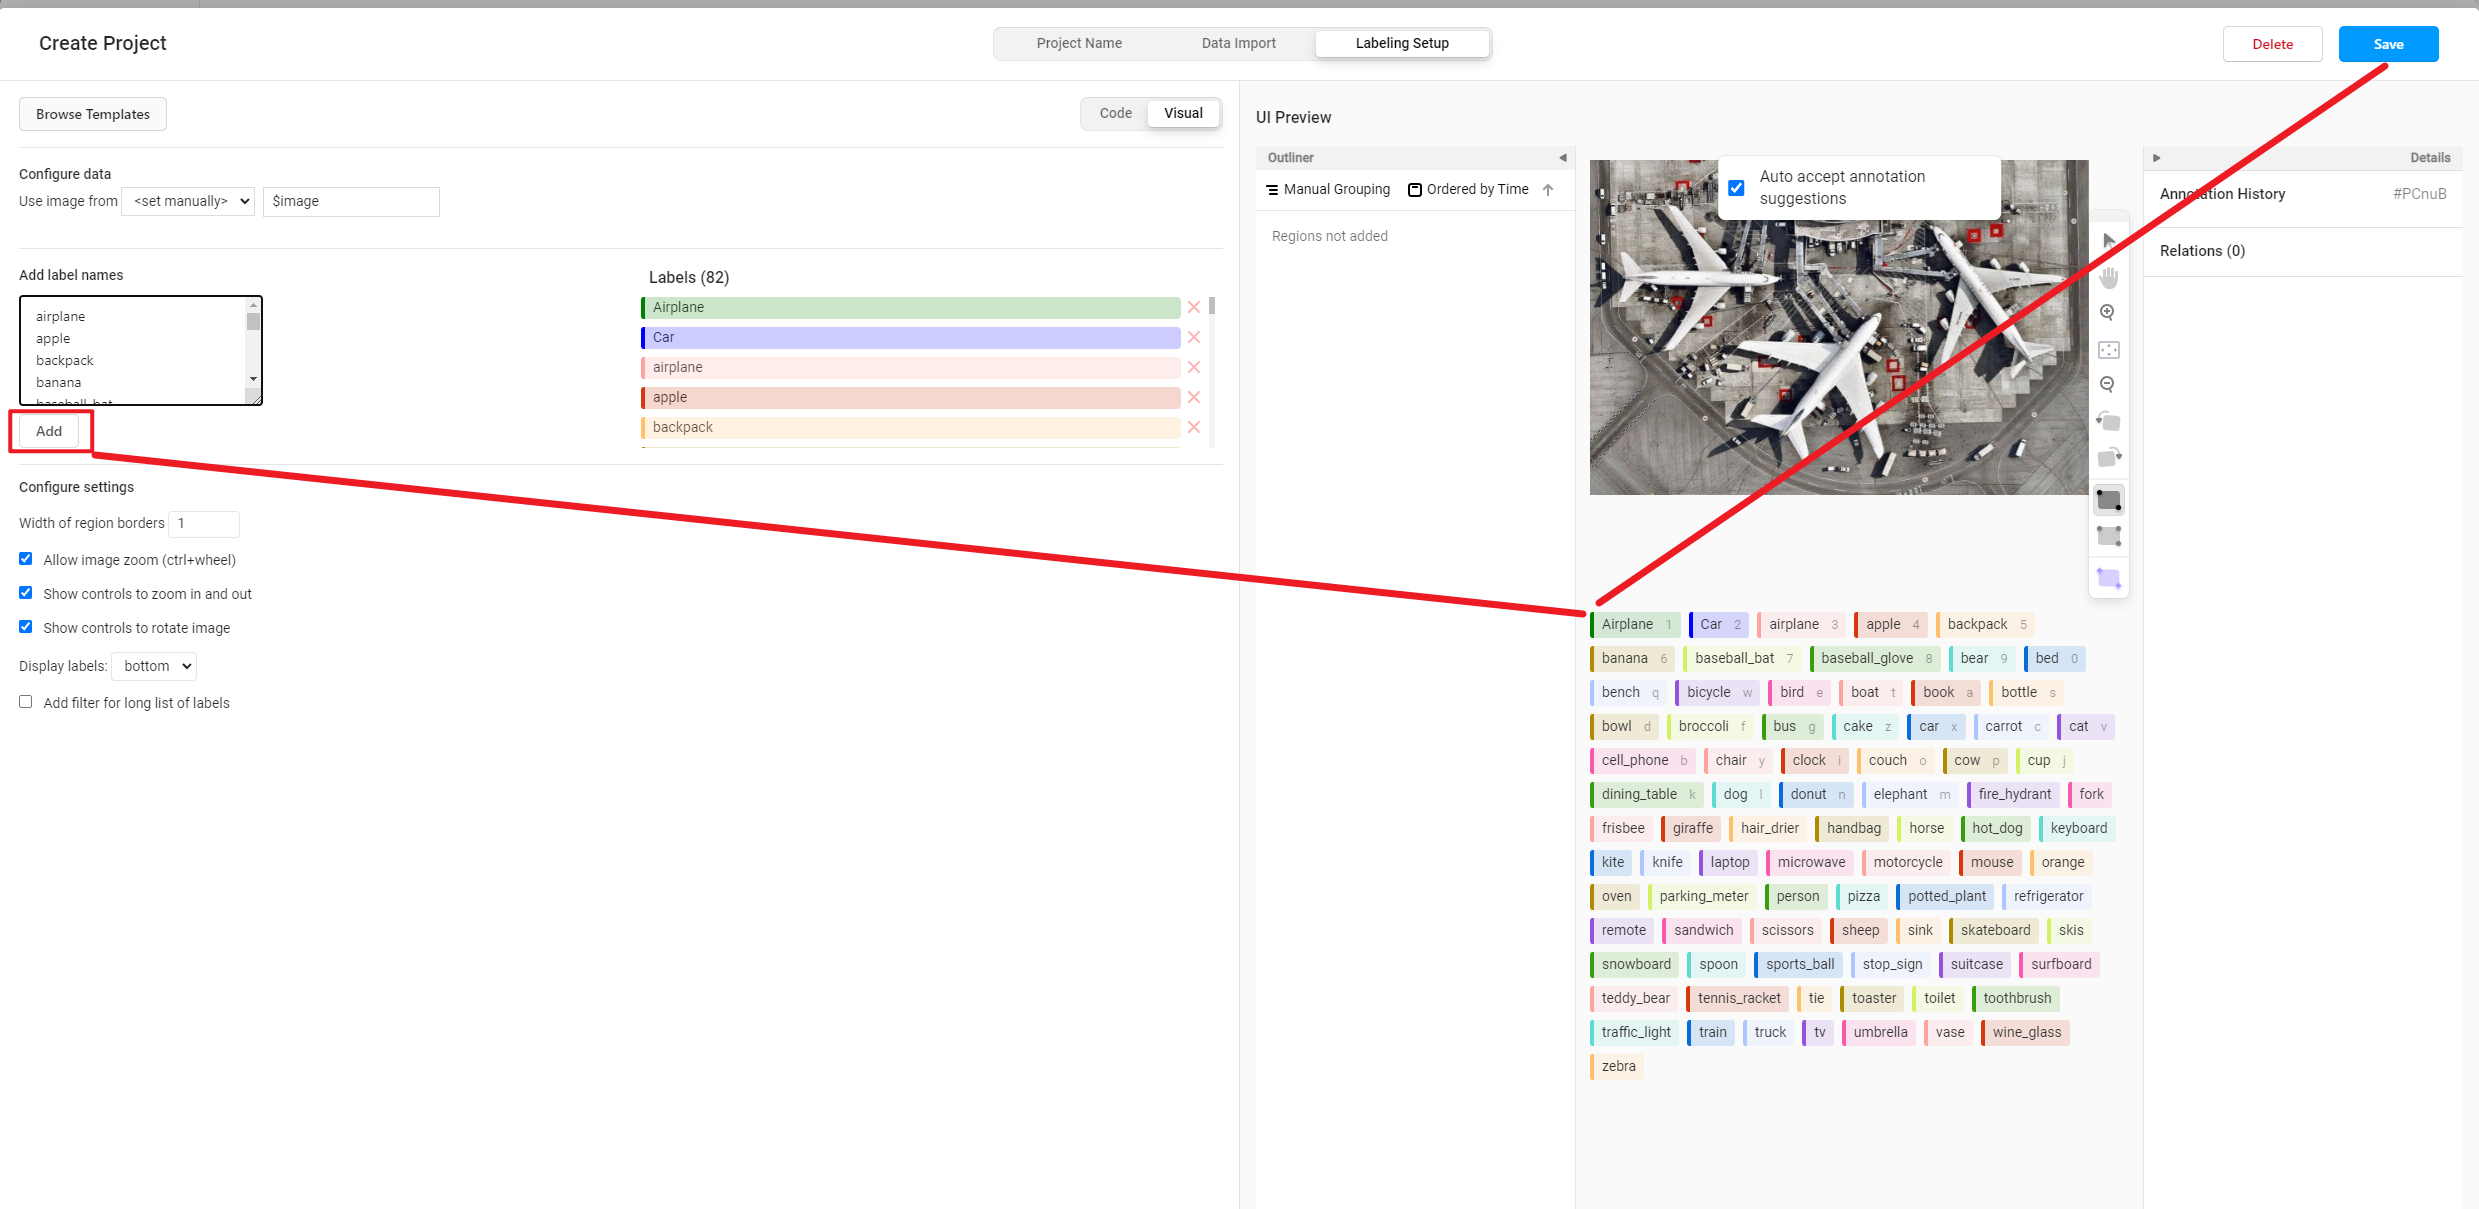
然后选择 Object Detection With Bounding Boxes 模板

```shell
airplane
apple
backpack
banana
baseball_bat
baseball_glove
bear
bed
bench
bicycle
bird
boat
book
bottle
bowl
broccoli
bus
cake
car
carrot
cat
cell_phone
chair
clock
couch
cow
cup
dining_table
dog
donut
elephant
fire_hydrant
fork
frisbee
giraffe
hair_drier
handbag
horse
hot_dog
keyboard
kite
knife
laptop
microwave
motorcycle
mouse
orange
oven
parking_meter
person
pizza
potted_plant
refrigerator
remote
sandwich
scissors
sheep
sink
skateboard
skis
snowboard
spoon
sports_ball
stop_sign
suitcase
surfboard
teddy_bear
tennis_racket
tie
toaster
toilet
toothbrush
traffic_light
train
truck
tv
umbrella
vase
wine_glass
zebra
```
然后将上述类别复制添加到 Label-Studio,然后点击 Save。
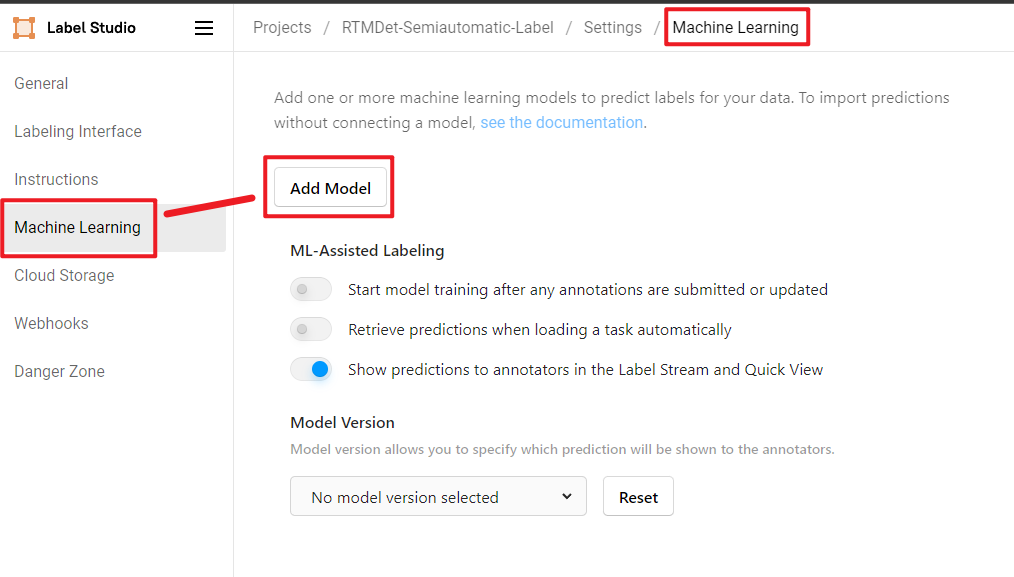
然后在设置中点击 Add Model 添加 RTMDet 后端推理服务。
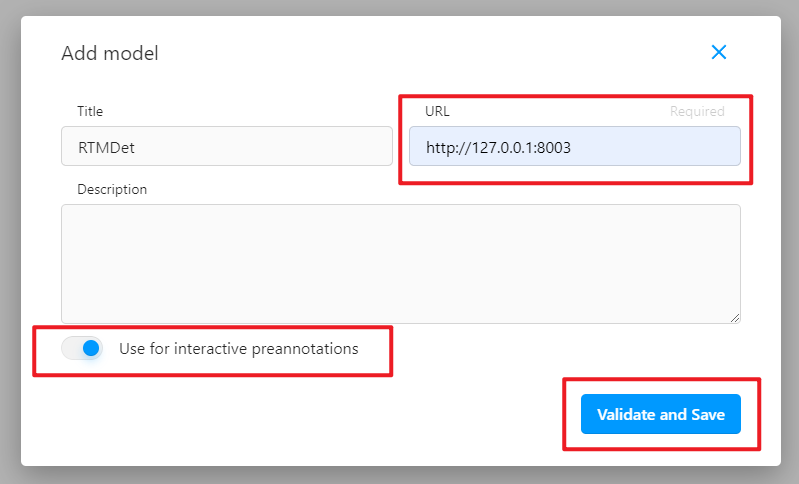
点击 Validate and Save,然后点击 Start Labeling。
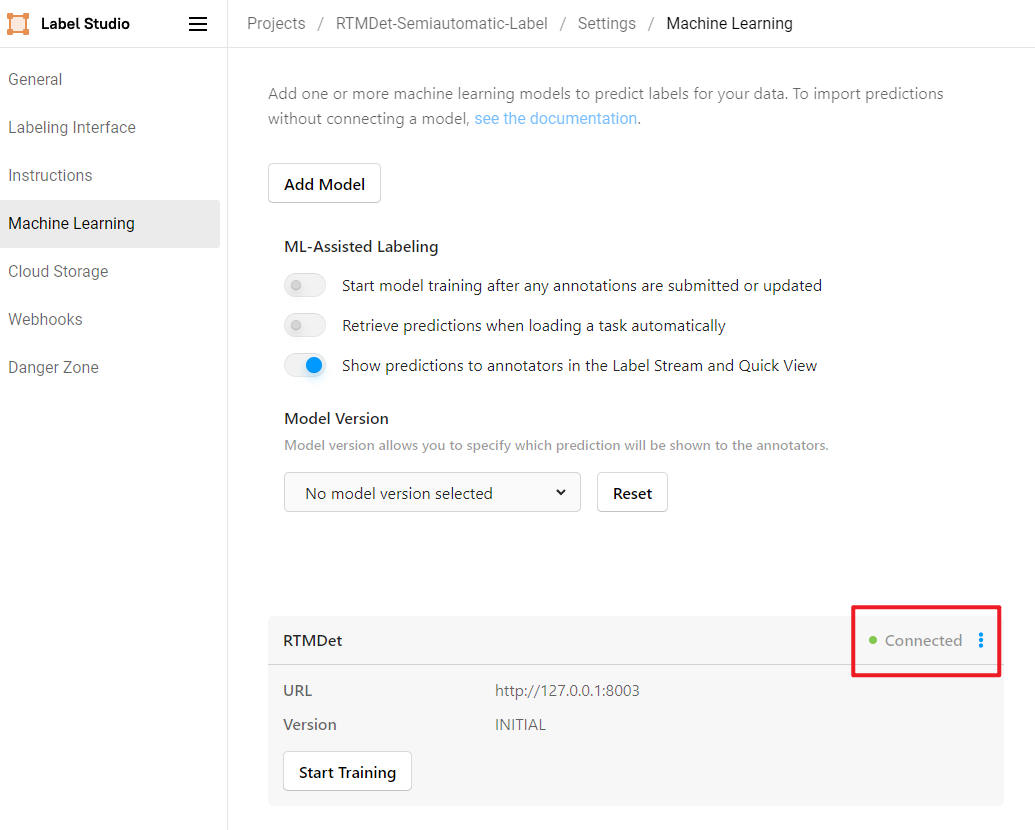
看到如下 Connected 就说明后端推理服务添加成功。
## 开始半自动化标注
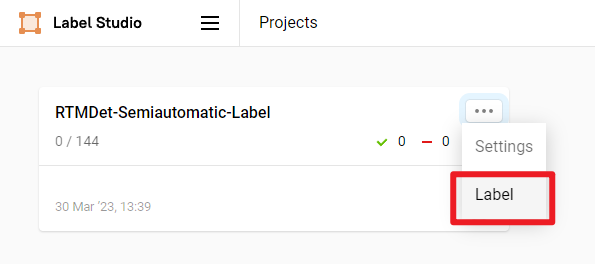
点击 Label 开始标注
我们可以看到 RTMDet 后端推理服务已经成功返回了预测结果并显示在图片上,我们可以发现这个喵喵预测的框有点大。
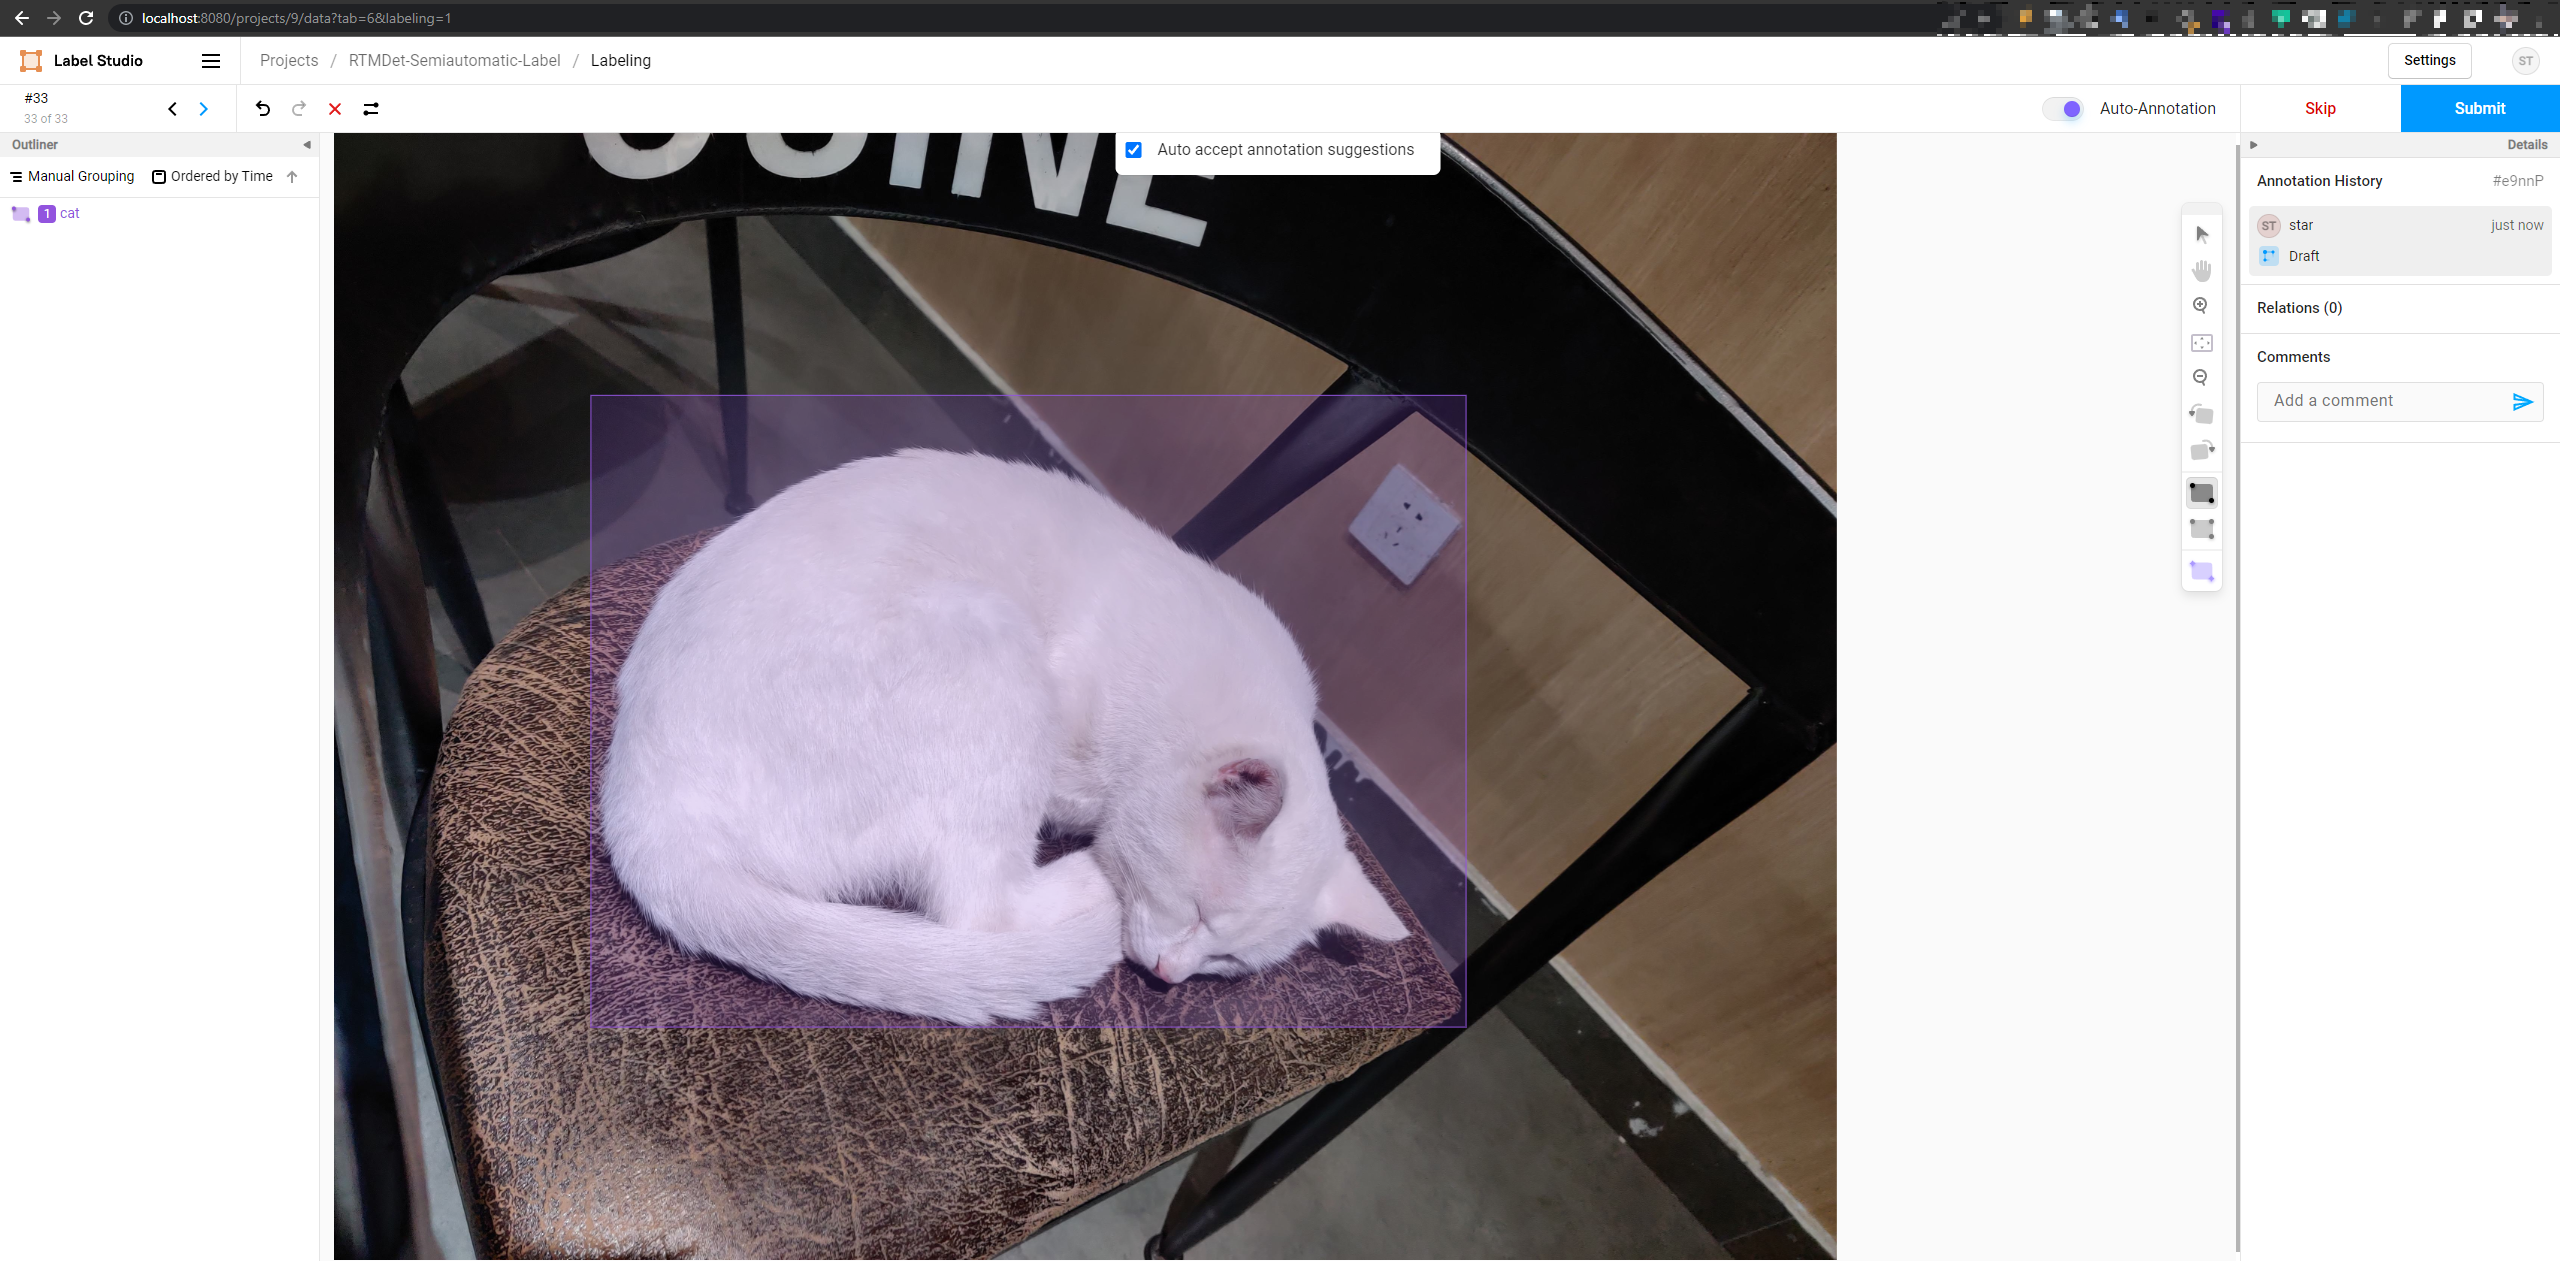
我们手工拖动框,修正一下框的位置,得到以下修正过后的标注,然后点击 Submit,本张图片就标注完毕了。

我们 submit 完毕所有图片后,点击 exprot 导出 COCO 格式的数据集,就能把标注好的数据集的压缩包导出来了。
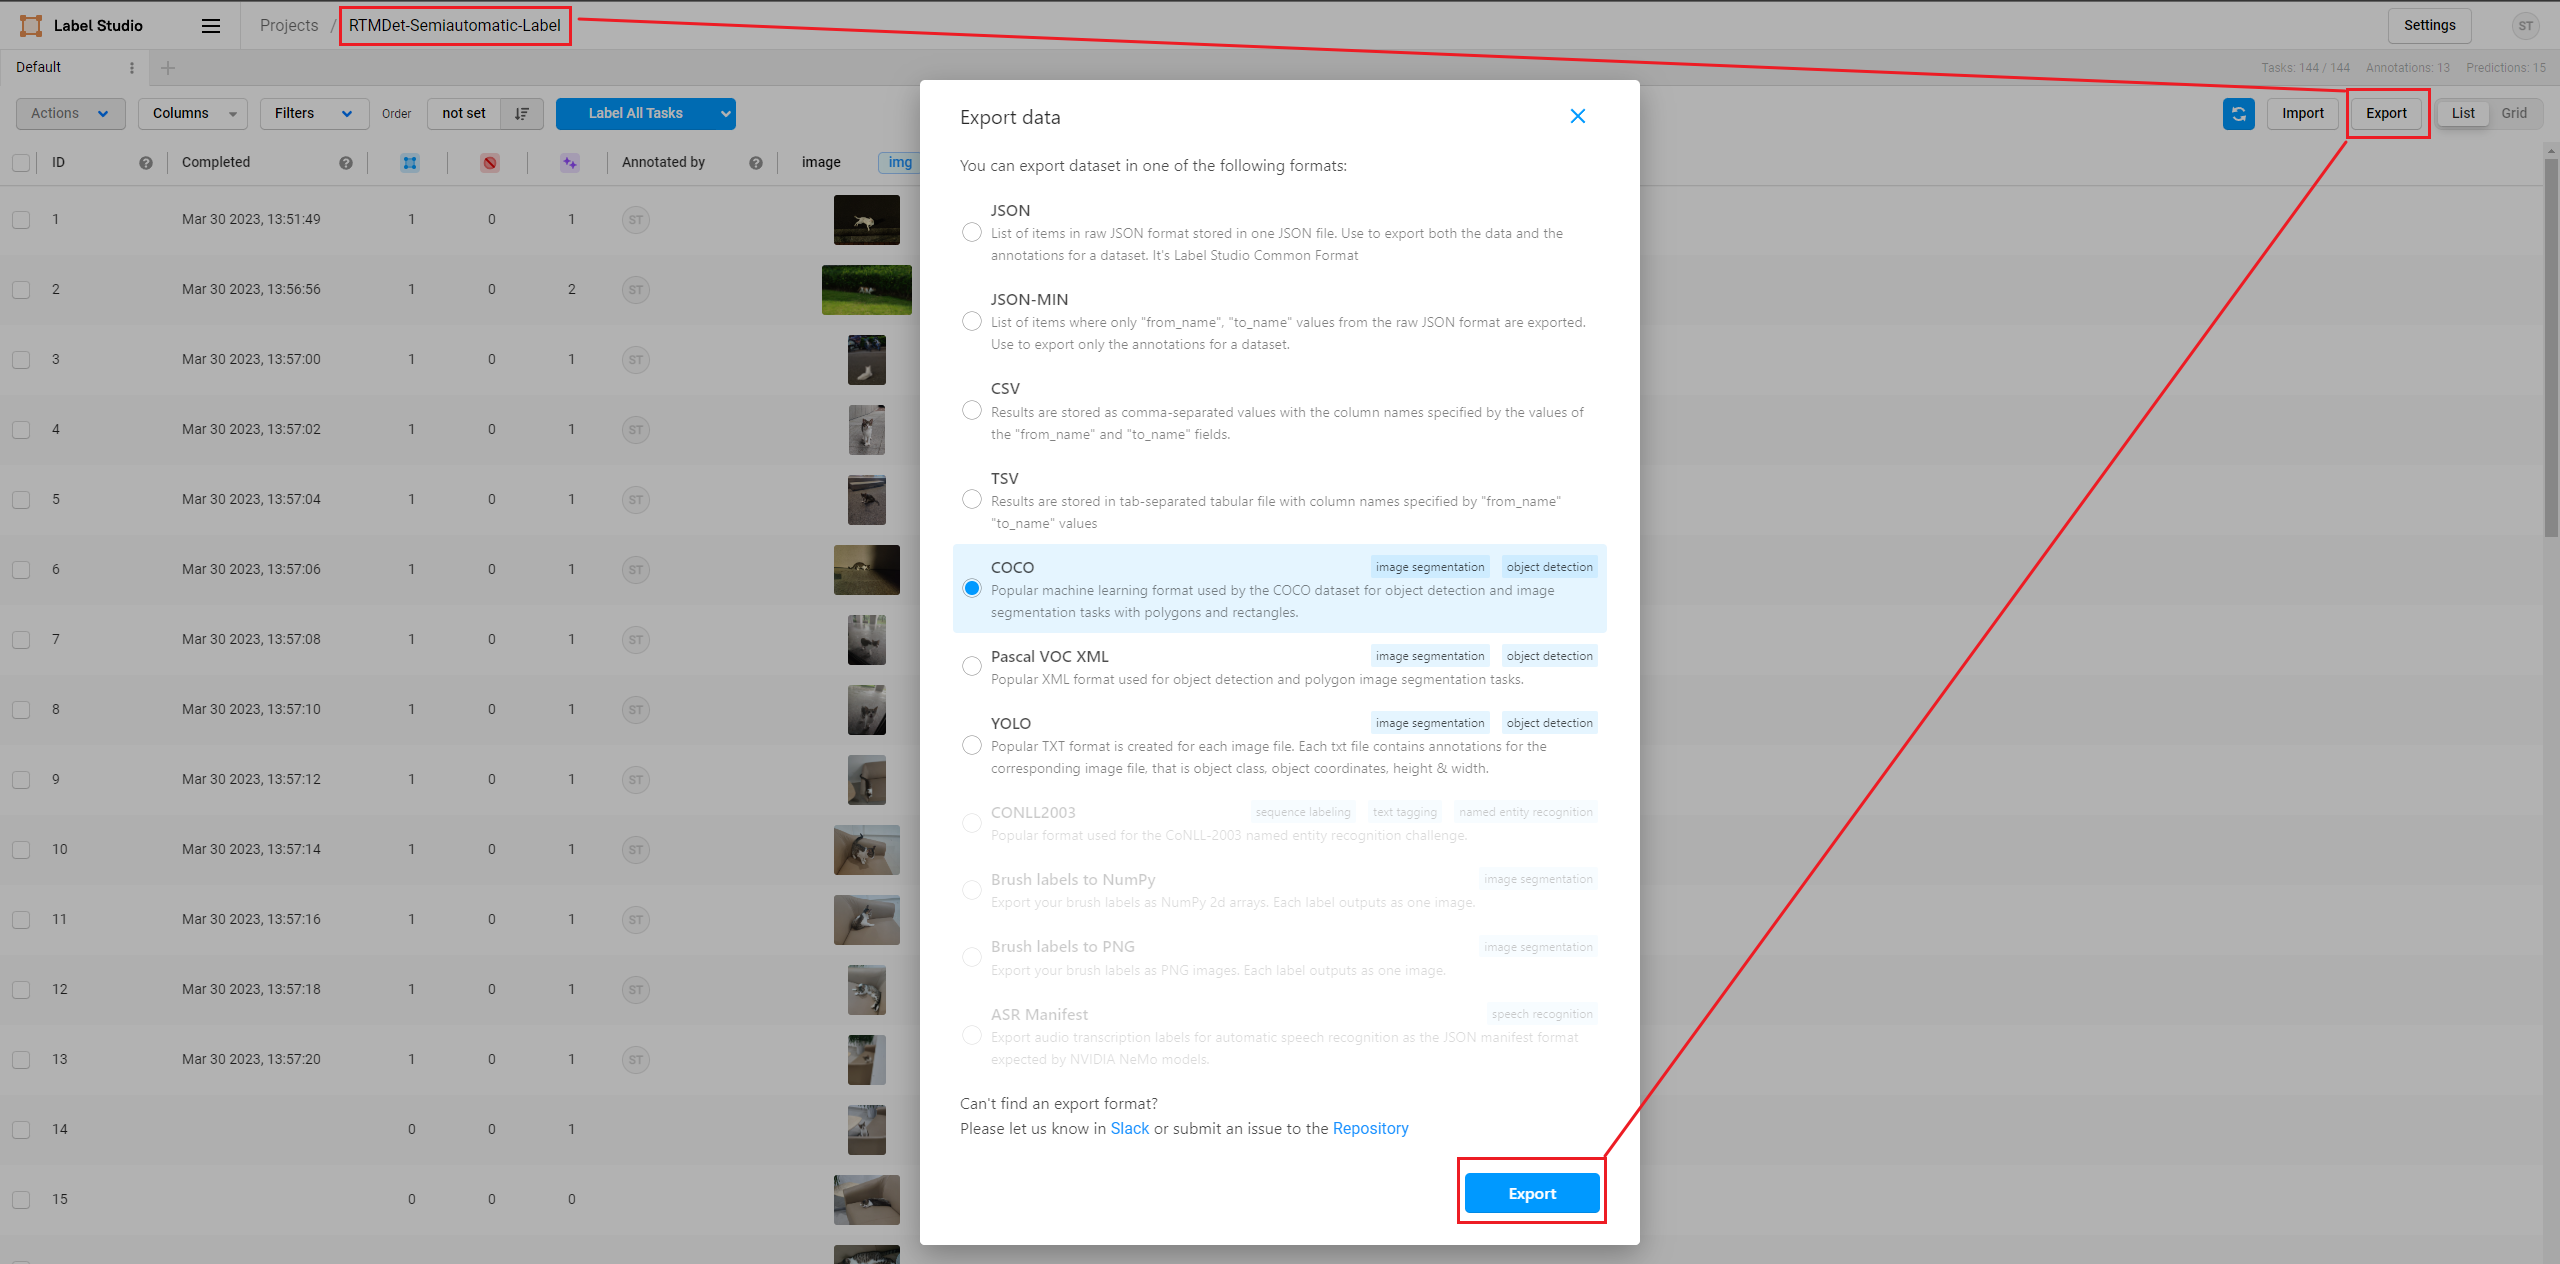
用 vscode 打开解压后的文件夹,可以看到标注好的数据集,包含了图片和 json 格式的标注文件。
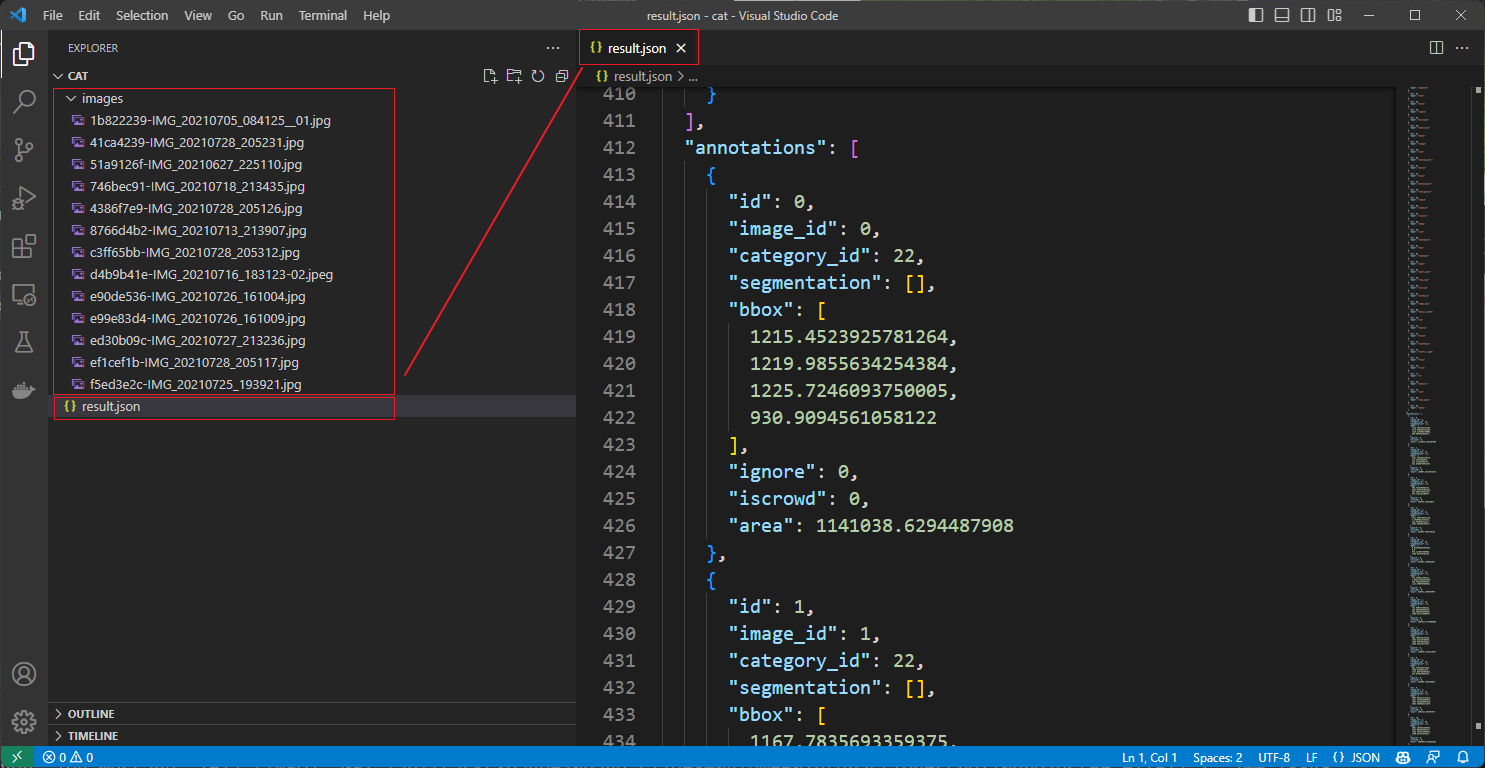
到此半自动化标注就完成了,我们可以用这个数据集在 MMDetection 训练精度更高的模型了,训练出更好的模型,然后再用这个模型继续半自动化标注新采集的图片,这样就可以不断迭代,扩充高质量数据集,提高模型的精度。
## 使用 MMYOLO 作为后端推理服务
如果想在 MMYOLO 中使用 Label-Studio,可以参考在启动后端推理服务时,将 config_file 和 checkpoint_file 替换为 MMYOLO 的配置文件和权重文件即可。
```shell
cd path/to/mmetection
label-studio-ml start projects/LabelStudio/backend_template --with \
config_file= path/to/mmyolo_config.py \
checkpoint_file= path/to/mmyolo_weights.pth \
device=cpu \
--port 8003
# device=cpu 为使用 CPU 推理,如果使用 GPU 推理,将 cpu 替换为 cuda:0
```
旋转目标检测和实例分割还在支持中,敬请期待。
|