
| # Semi-automatic Object Detection Annotation with MMDetection and Label-Studio | |
| Annotation data is a time-consuming and laborious task. This article introduces how to perform semi-automatic annotation using the RTMDet algorithm in MMDetection in conjunction with Label-Studio software. Specifically, using RTMDet to predict image annotations and then refining the annotations with Label-Studio. Community users can refer to this process and methodology and apply it to other fields. | |
| - RTMDet: RTMDet is a high-precision single-stage object detection algorithm developed by OpenMMLab, open-sourced in the MMDetection object detection toolbox. Its open-source license is Apache 2.0, and it can be used freely without restrictions by industrial users. | |
| - [Label Studio](https://github.com/heartexlabs/label-studio) is an excellent annotation software covering the functionality of dataset annotation in areas such as image classification, object detection, and segmentation. | |
| In this article, we will use [cat](https://download.openmmlab.com/mmyolo/data/cat_dataset.zip) images for semi-automatic annotation. | |
| ## Environment Configuration | |
| To begin with, you need to create a virtual environment and then install PyTorch and MMCV. In this article, we will specify the versions of PyTorch and MMCV. Next, you can install MMDetection, Label-Studio, and label-studio-ml-backend using the following steps: | |
| Create a virtual environment: | |
| ```shell | |
| conda create -n rtmdet python=3.9 -y | |
| conda activate rtmdet | |
| ``` | |
| Install PyTorch: | |
| ```shell | |
| # Linux and Windows CPU only | |
| pip install torch==1.10.1+cpu torchvision==0.11.2+cpu torchaudio==0.10.1 -f https://download.pytorch.org/whl/cpu/torch_stable.html | |
| # Linux and Windows CUDA 11.3 | |
| pip install torch==1.10.1+cu113 torchvision==0.11.2+cu113 torchaudio==0.10.1 -f https://download.pytorch.org/whl/cu113/torch_stable.html | |
| # OSX | |
| pip install torch==1.10.1 torchvision==0.11.2 torchaudio==0.10.1 | |
| ``` | |
| Install MMCV: | |
| ```shell | |
| pip install -U openmim | |
| mim install "mmcv>=2.0.0" | |
| # Installing mmcv will automatically install mmengine | |
| ``` | |
| Install MMDetection: | |
| ```shell | |
| git clone https://github.com/open-mmlab/mmdetection | |
| cd mmdetection | |
| pip install -v -e . | |
| ``` | |
| Install Label-Studio and label-studio-ml-backend: | |
| ```shell | |
| # Installing Label-Studio may take some time, if the version is not found, please use the official source | |
| pip install label-studio==1.7.2 | |
| pip install label-studio-ml==1.0.9 | |
| ``` | |
| Download the rtmdet weights: | |
| ```shell | |
| cd path/to/mmetection | |
| mkdir work_dirs | |
| cd work_dirs | |
| wget https://download.openmmlab.com/mmdetection/v3.0/rtmdet/rtmdet_m_8xb32-300e_coco/rtmdet_m_8xb32-300e_coco_20220719_112220-229f527c.pth | |
| ``` | |
| ## Start the Service | |
| Start the RTMDet backend inference service: | |
| ```shell | |
| cd path/to/mmetection | |
| label-studio-ml start projects/LabelStudio/backend_template --with \ | |
| config_file=configs/rtmdet/rtmdet_m_8xb32-300e_coco.py \ | |
| checkpoint_file=./work_dirs/rtmdet_m_8xb32-300e_coco_20220719_112220-229f527c.pth \ | |
| device=cpu \ | |
| --port 8003 | |
| # Set device=cpu to use CPU inference, and replace cpu with cuda:0 to use GPU inference. | |
| ``` | |
| 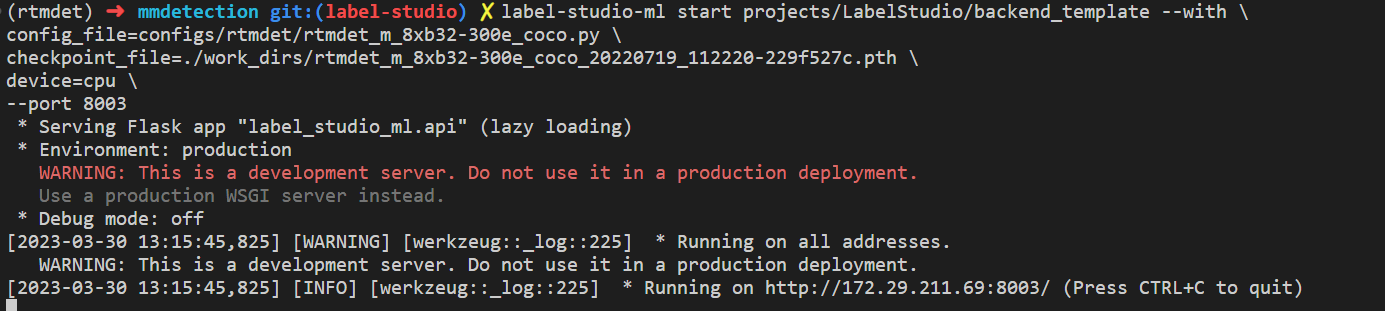 | |
| The RTMDet backend inference service has now been started. To configure it in the Label-Studio web system, use http://localhost:8003 as the backend inference service. | |
| Now, start the Label-Studio web service: | |
| ```shell | |
| label-studio start | |
| ``` | |
| 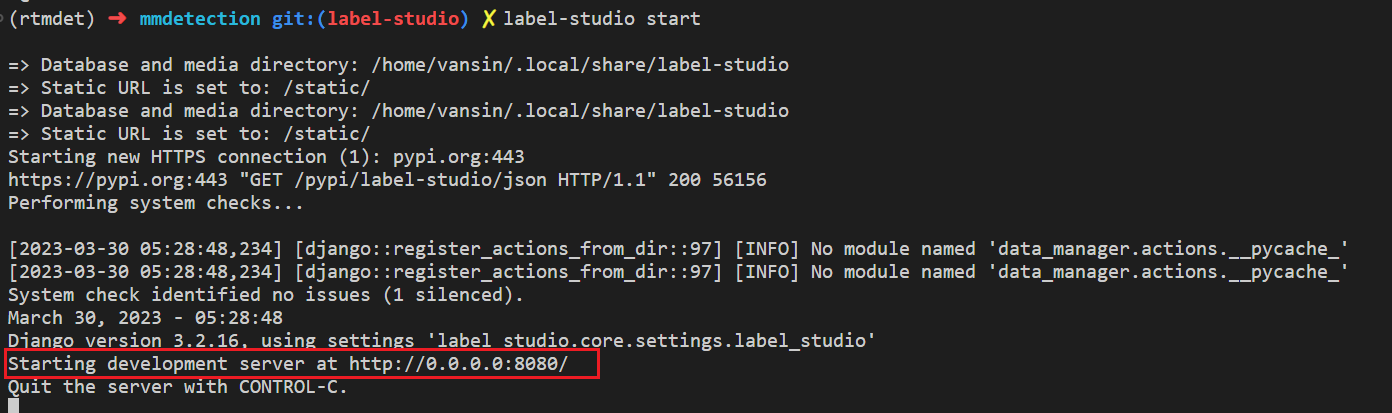 | |
| Open your web browser and go to http://localhost:8080/ to see the Label-Studio interface. | |
|  | |
| Register a user and then create an RTMDet-Semiautomatic-Label project. | |
| 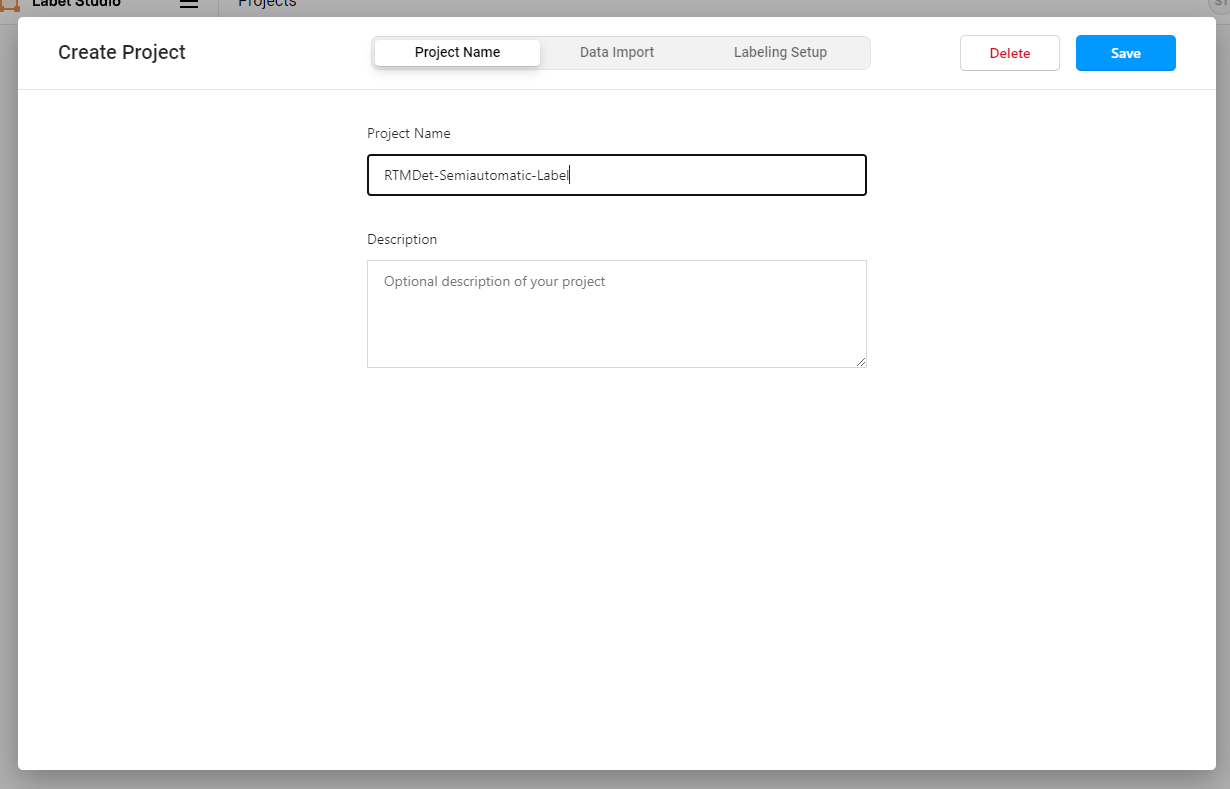 | |
| Download the example cat images by running the following command and import them using the Data Import button: | |
| ```shell | |
| cd path/to/mmetection | |
| mkdir data && cd data | |
| wget https://download.openmmlab.com/mmyolo/data/cat_dataset.zip && unzip cat_dataset.zip | |
| ``` | |
| 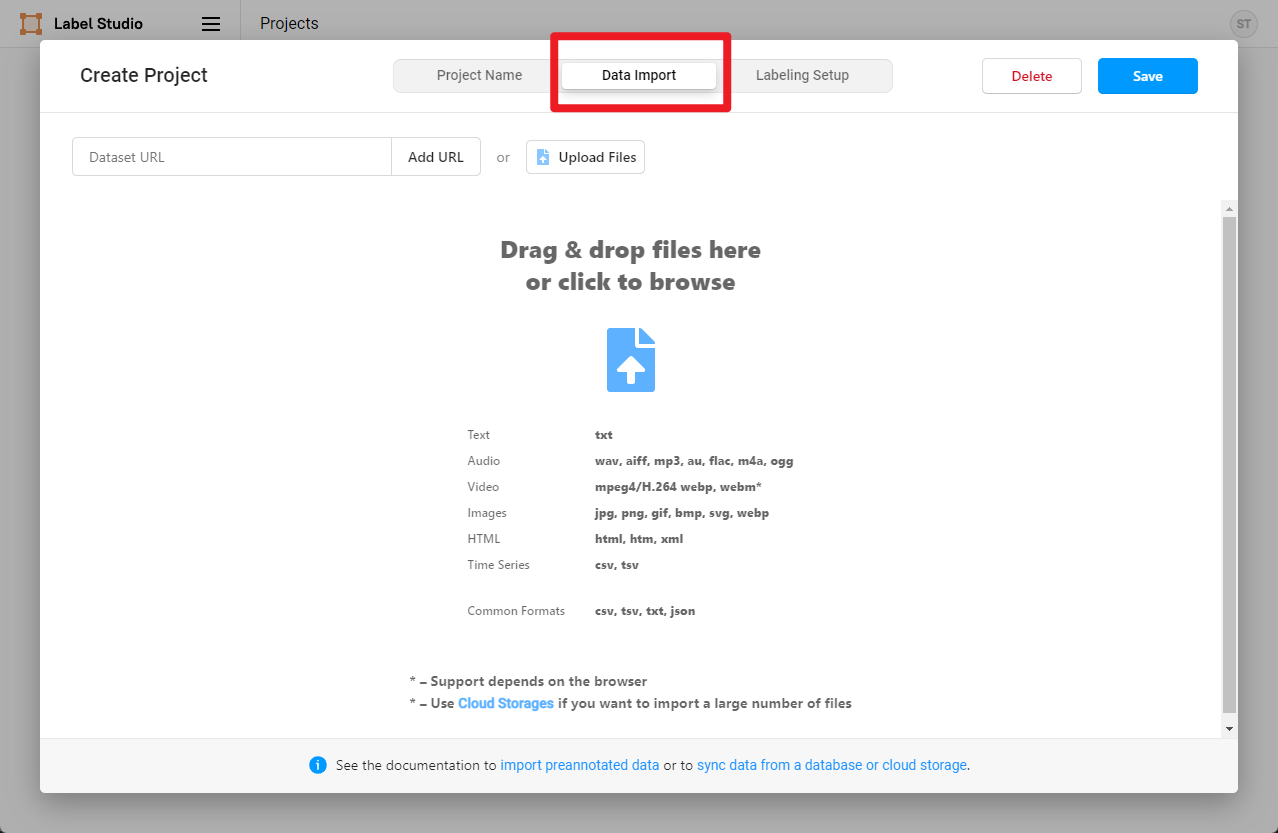 | |
| 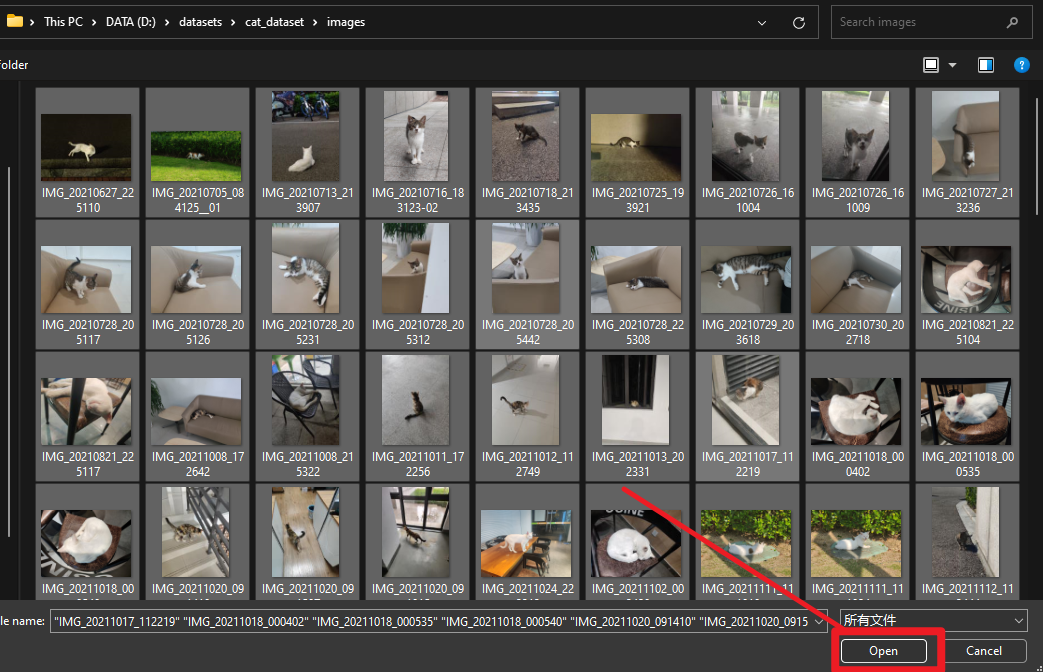 | |
| Then, select the Object Detection With Bounding Boxes template. | |
|  | |
| ```shell | |
| airplane | |
| apple | |
| backpack | |
| banana | |
| baseball_bat | |
| baseball_glove | |
| bear | |
| bed | |
| bench | |
| bicycle | |
| bird | |
| boat | |
| book | |
| bottle | |
| bowl | |
| broccoli | |
| bus | |
| cake | |
| car | |
| carrot | |
| cat | |
| cell_phone | |
| chair | |
| clock | |
| couch | |
| cow | |
| cup | |
| dining_table | |
| dog | |
| donut | |
| elephant | |
| fire_hydrant | |
| fork | |
| frisbee | |
| giraffe | |
| hair_drier | |
| handbag | |
| horse | |
| hot_dog | |
| keyboard | |
| kite | |
| knife | |
| laptop | |
| microwave | |
| motorcycle | |
| mouse | |
| orange | |
| oven | |
| parking_meter | |
| person | |
| pizza | |
| potted_plant | |
| refrigerator | |
| remote | |
| sandwich | |
| scissors | |
| sheep | |
| sink | |
| skateboard | |
| skis | |
| snowboard | |
| spoon | |
| sports_ball | |
| stop_sign | |
| suitcase | |
| surfboard | |
| teddy_bear | |
| tennis_racket | |
| tie | |
| toaster | |
| toilet | |
| toothbrush | |
| traffic_light | |
| train | |
| truck | |
| tv | |
| umbrella | |
| vase | |
| wine_glass | |
| zebra | |
| ``` | |
| Then, copy and add the above categories to Label-Studio and click Save. | |
| 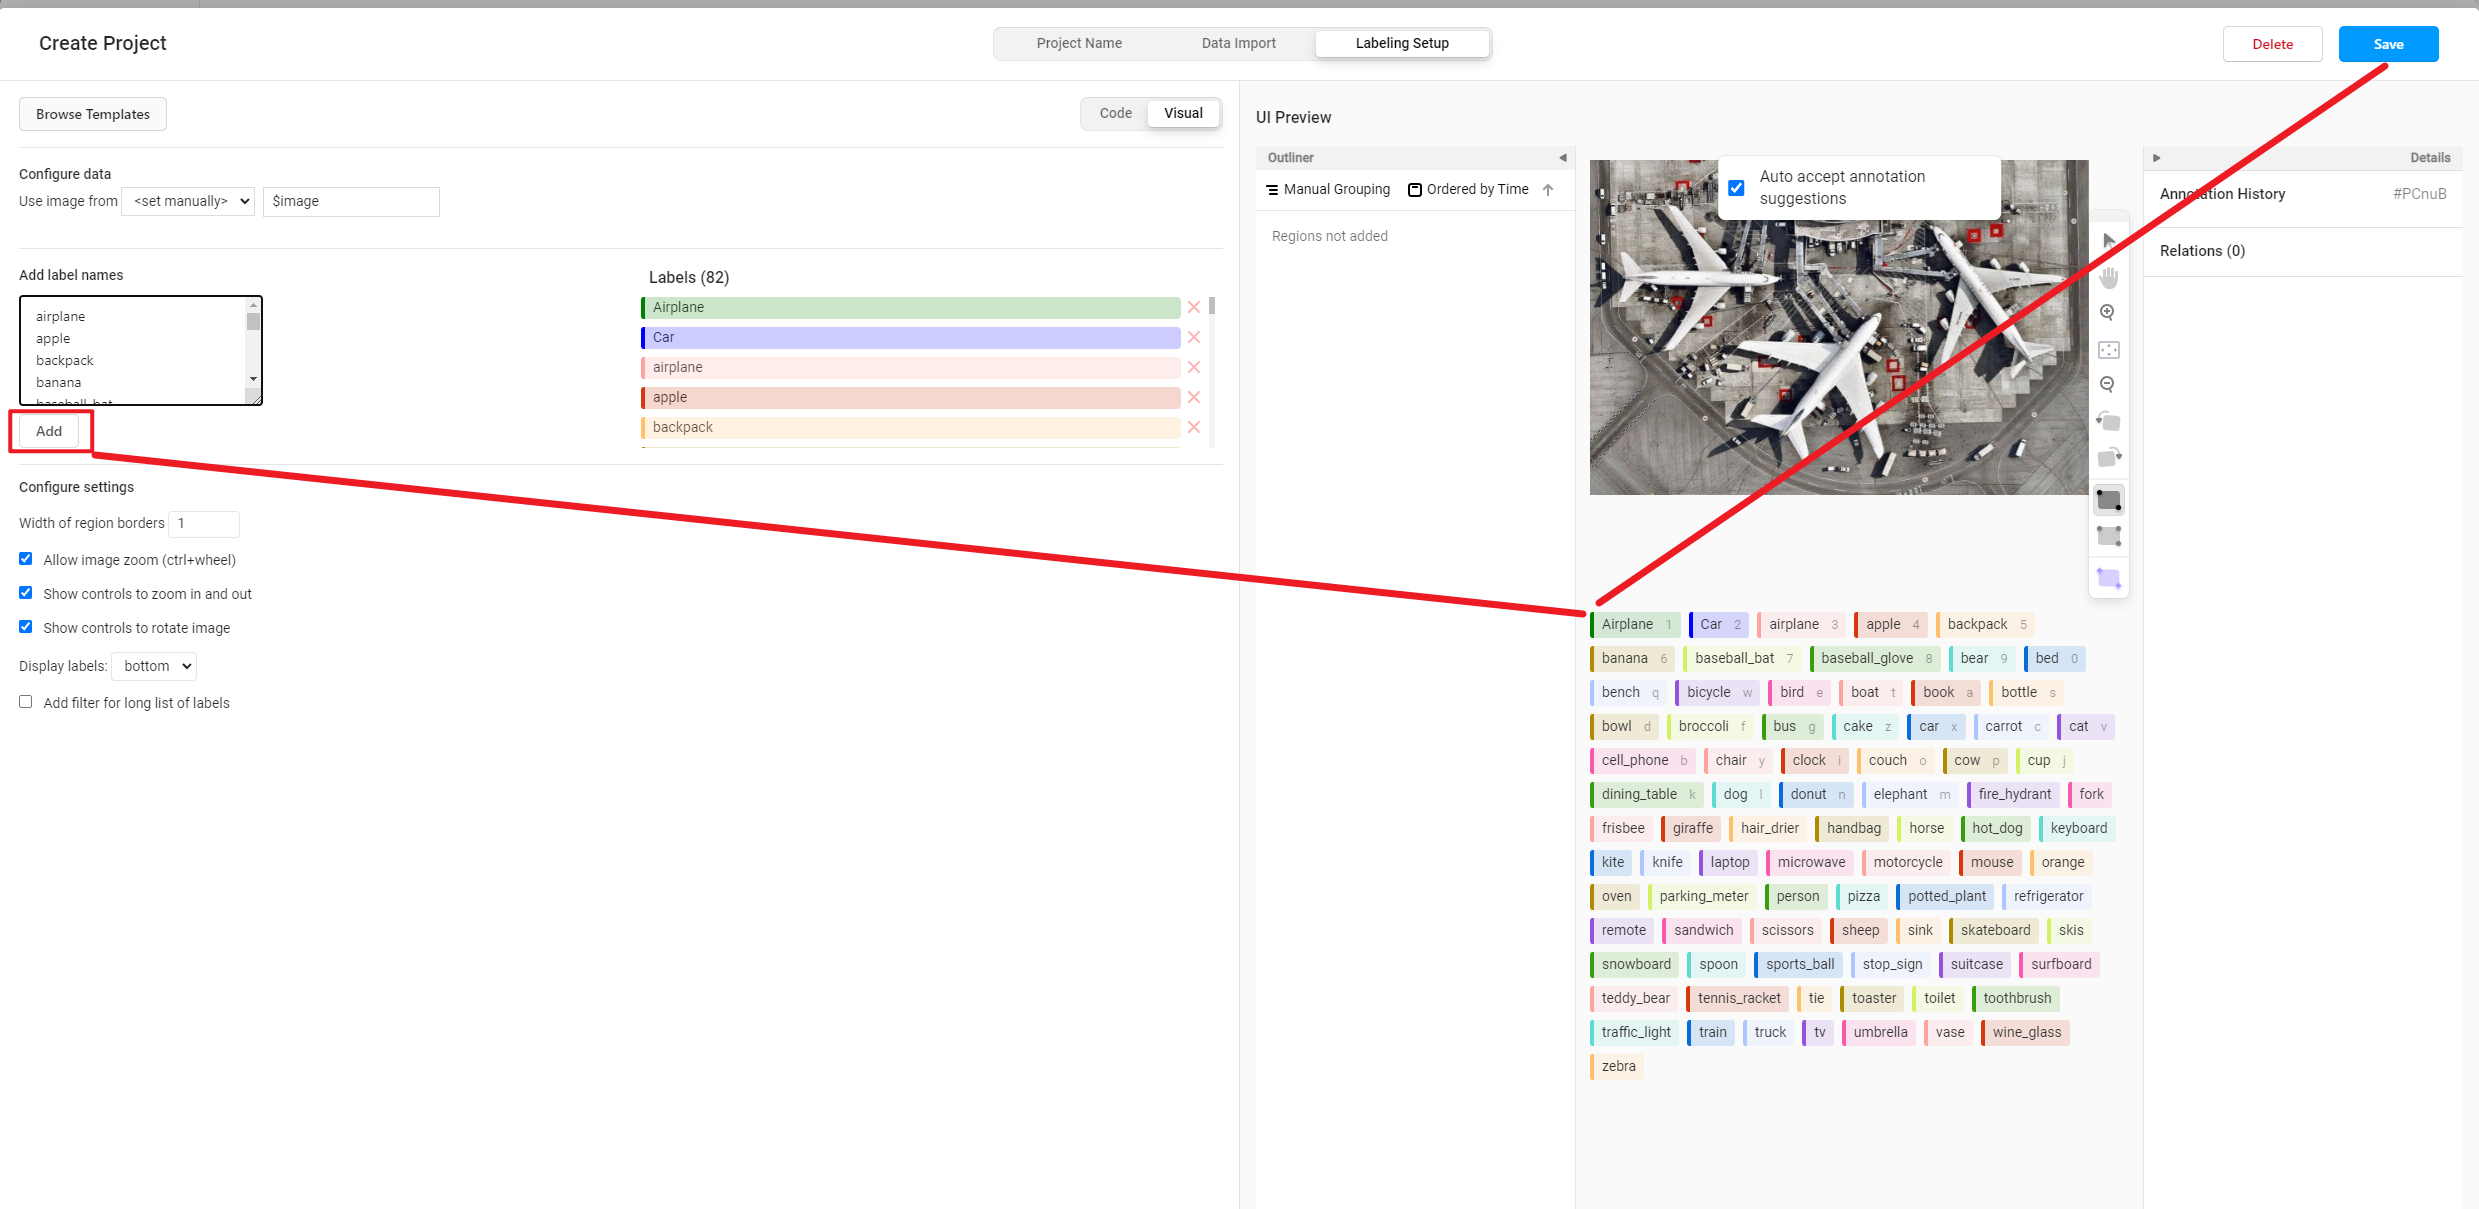 | |
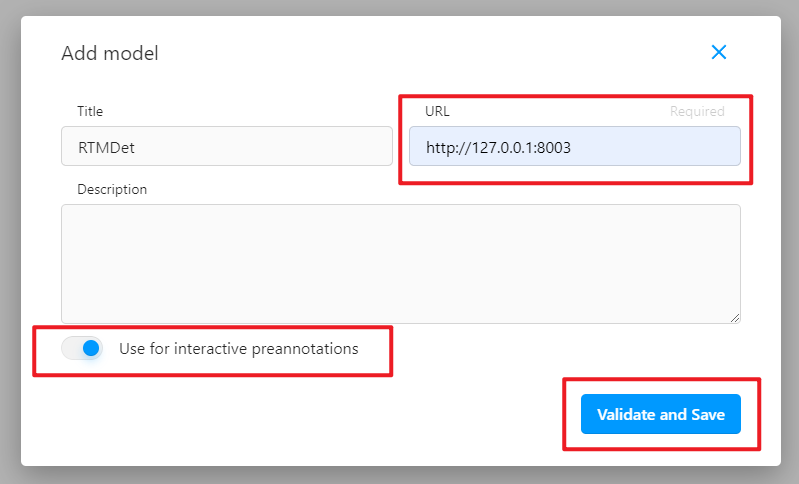
| In the Settings, click Add Model to add the RTMDet backend inference service. | |
|  | |
| Click Validate and Save, and then click Start Labeling. | |
|  | |
| If you see Connected as shown below, the backend inference service has been successfully added. | |
| 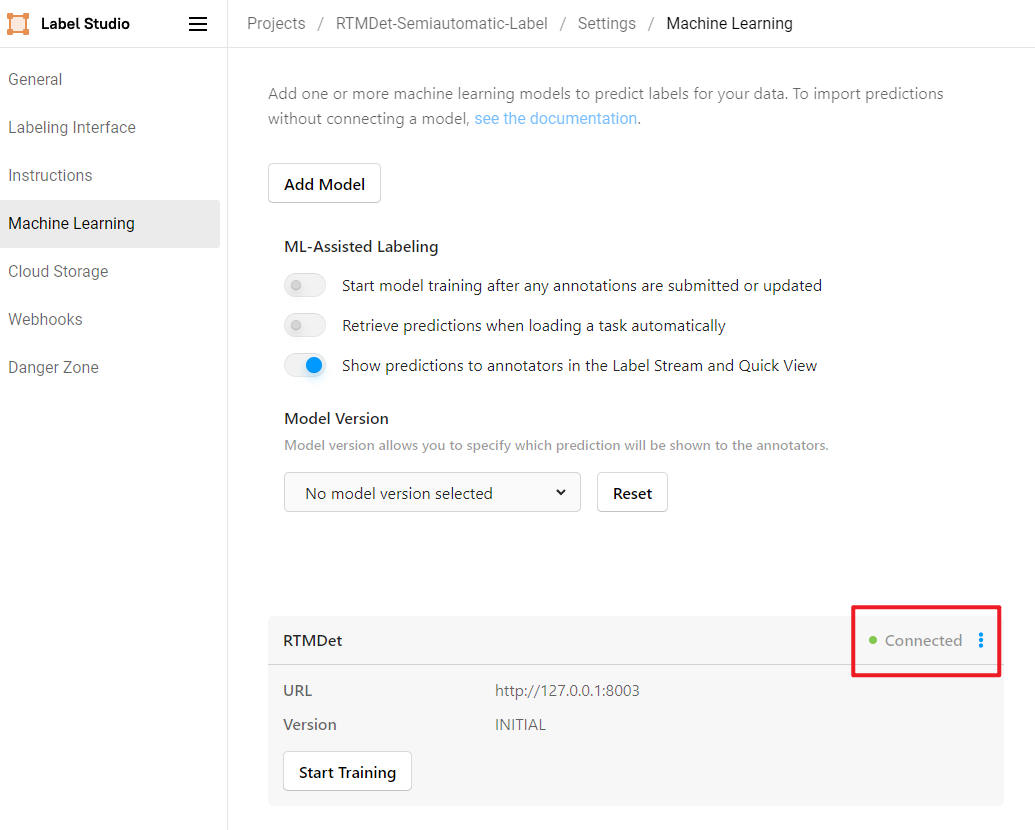 | |
| ## Start Semi-Automatic Labeling | |
| Click on Label to start labeling. | |
| 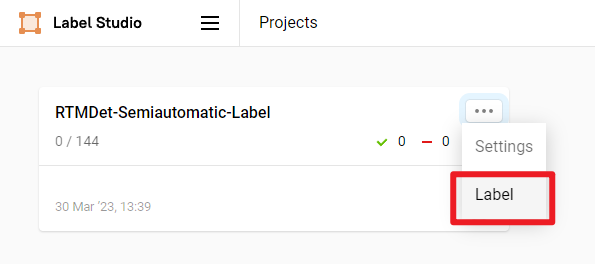 | |
| We can see that the RTMDet backend inference service has successfully returned the predicted results and displayed them on the image. However, we noticed that the predicted bounding boxes for the cats are a bit too large and not very accurate. | |
| 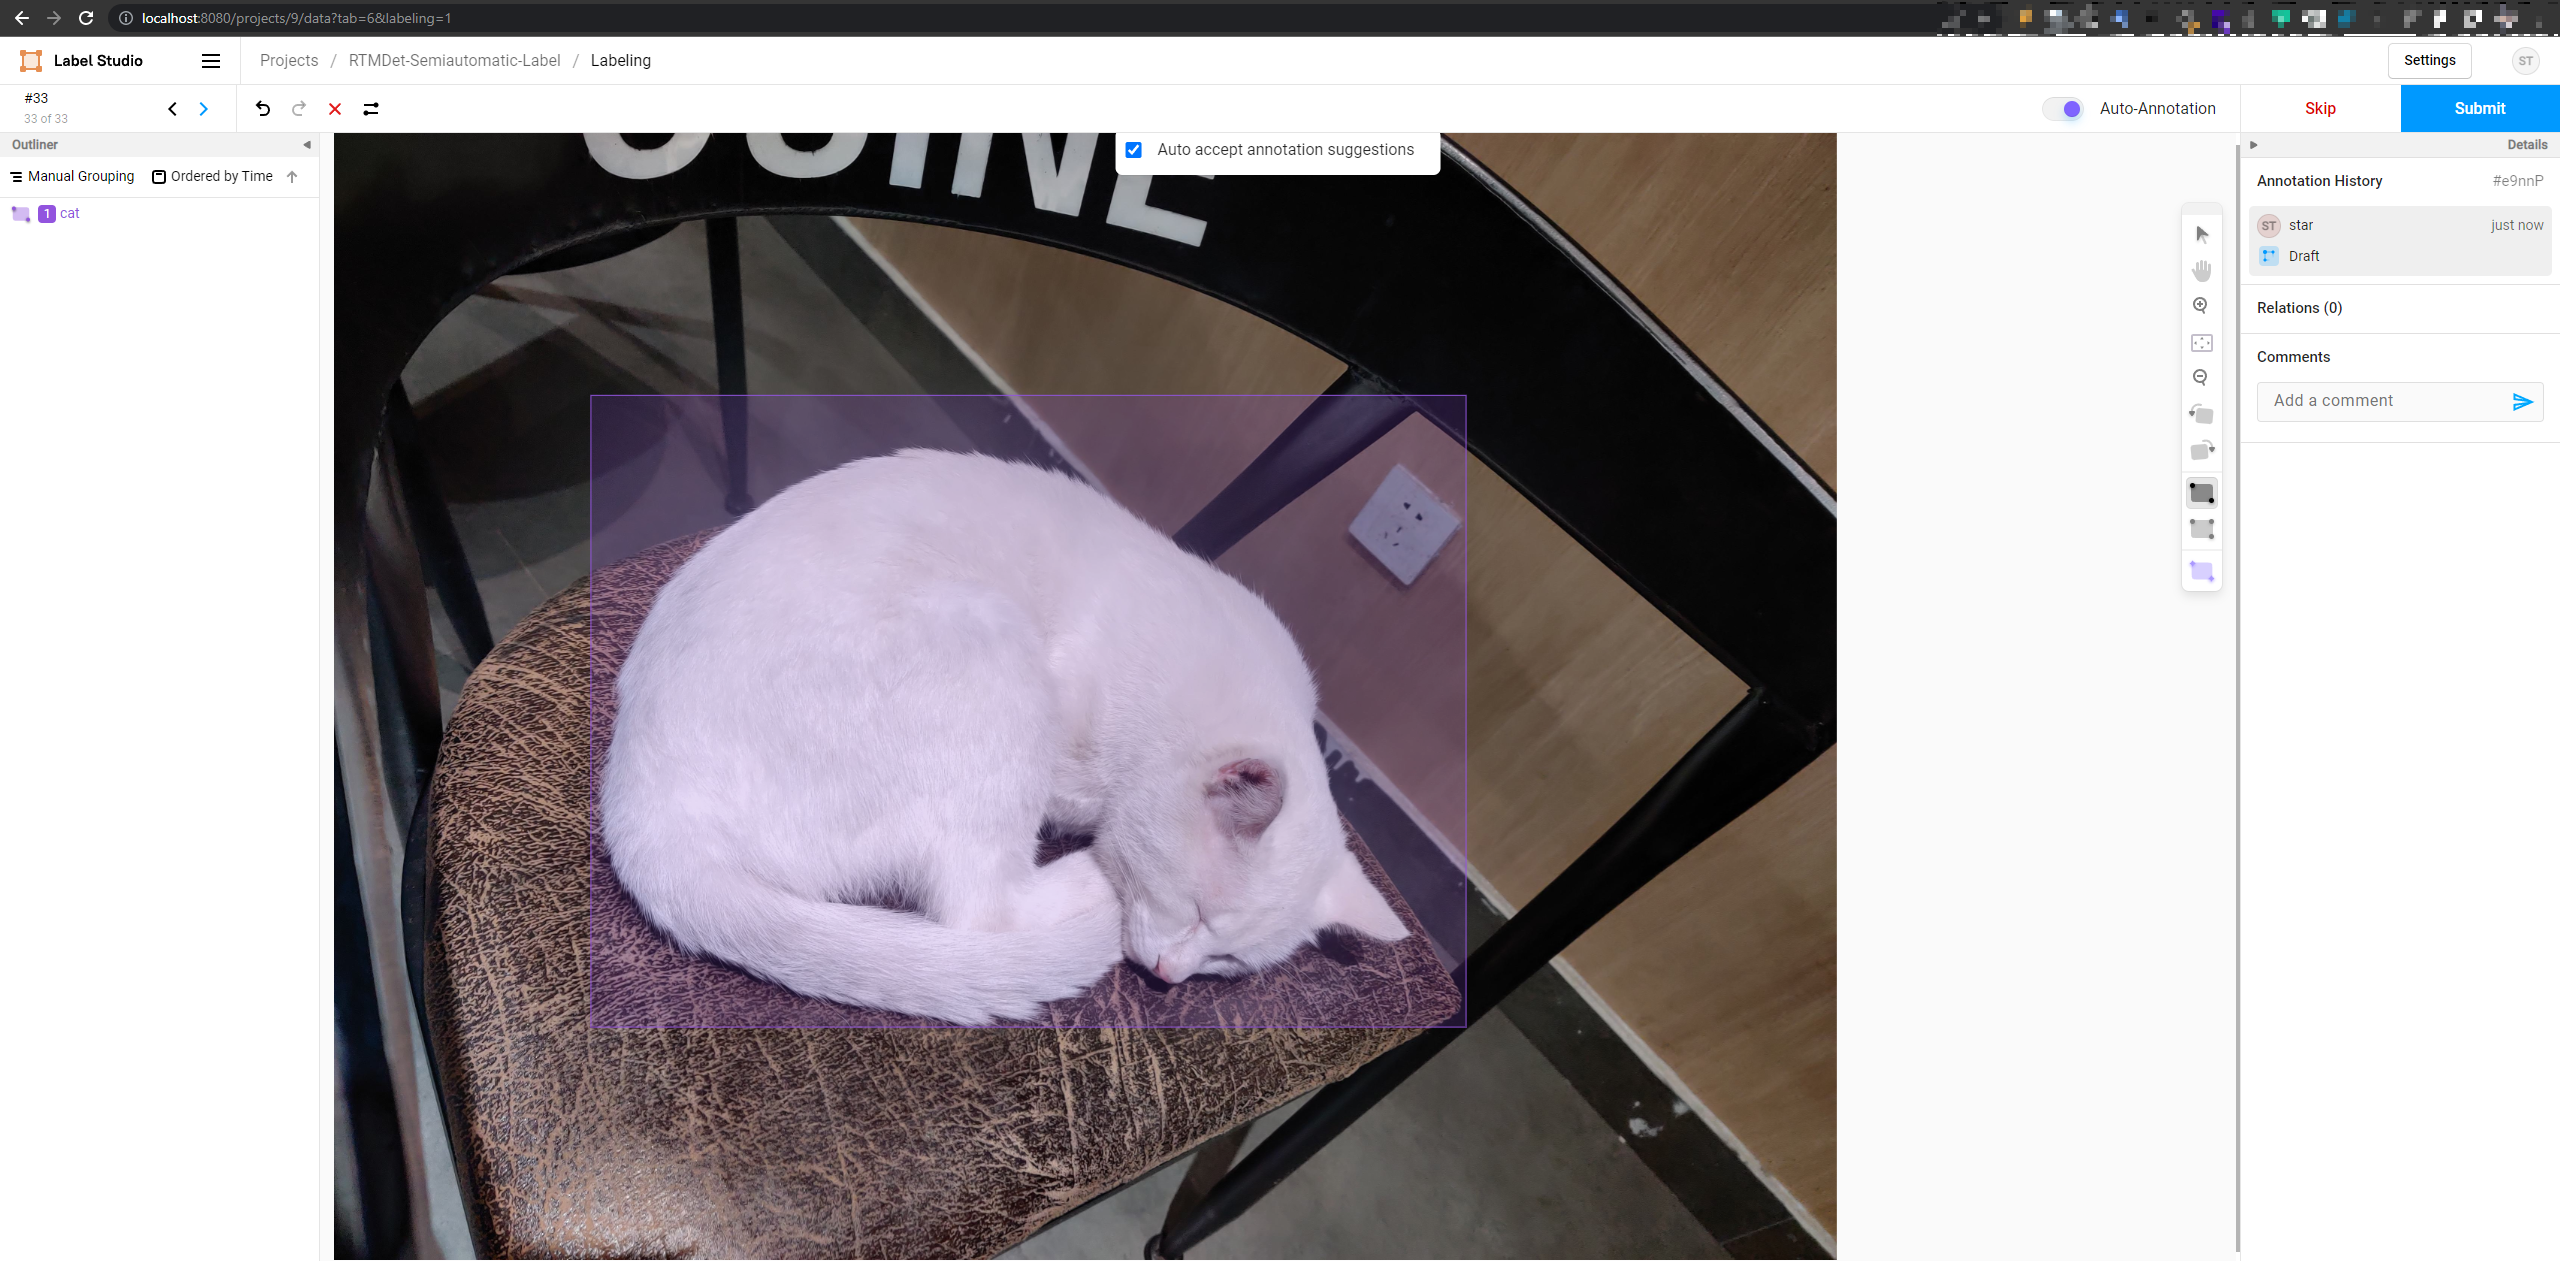 | |
| We manually adjust the position of the cat bounding box, and then click Submit to complete the annotation of this image. | |
|  | |
| After submitting all images, click export to export the labeled dataset in COCO format. | |
| 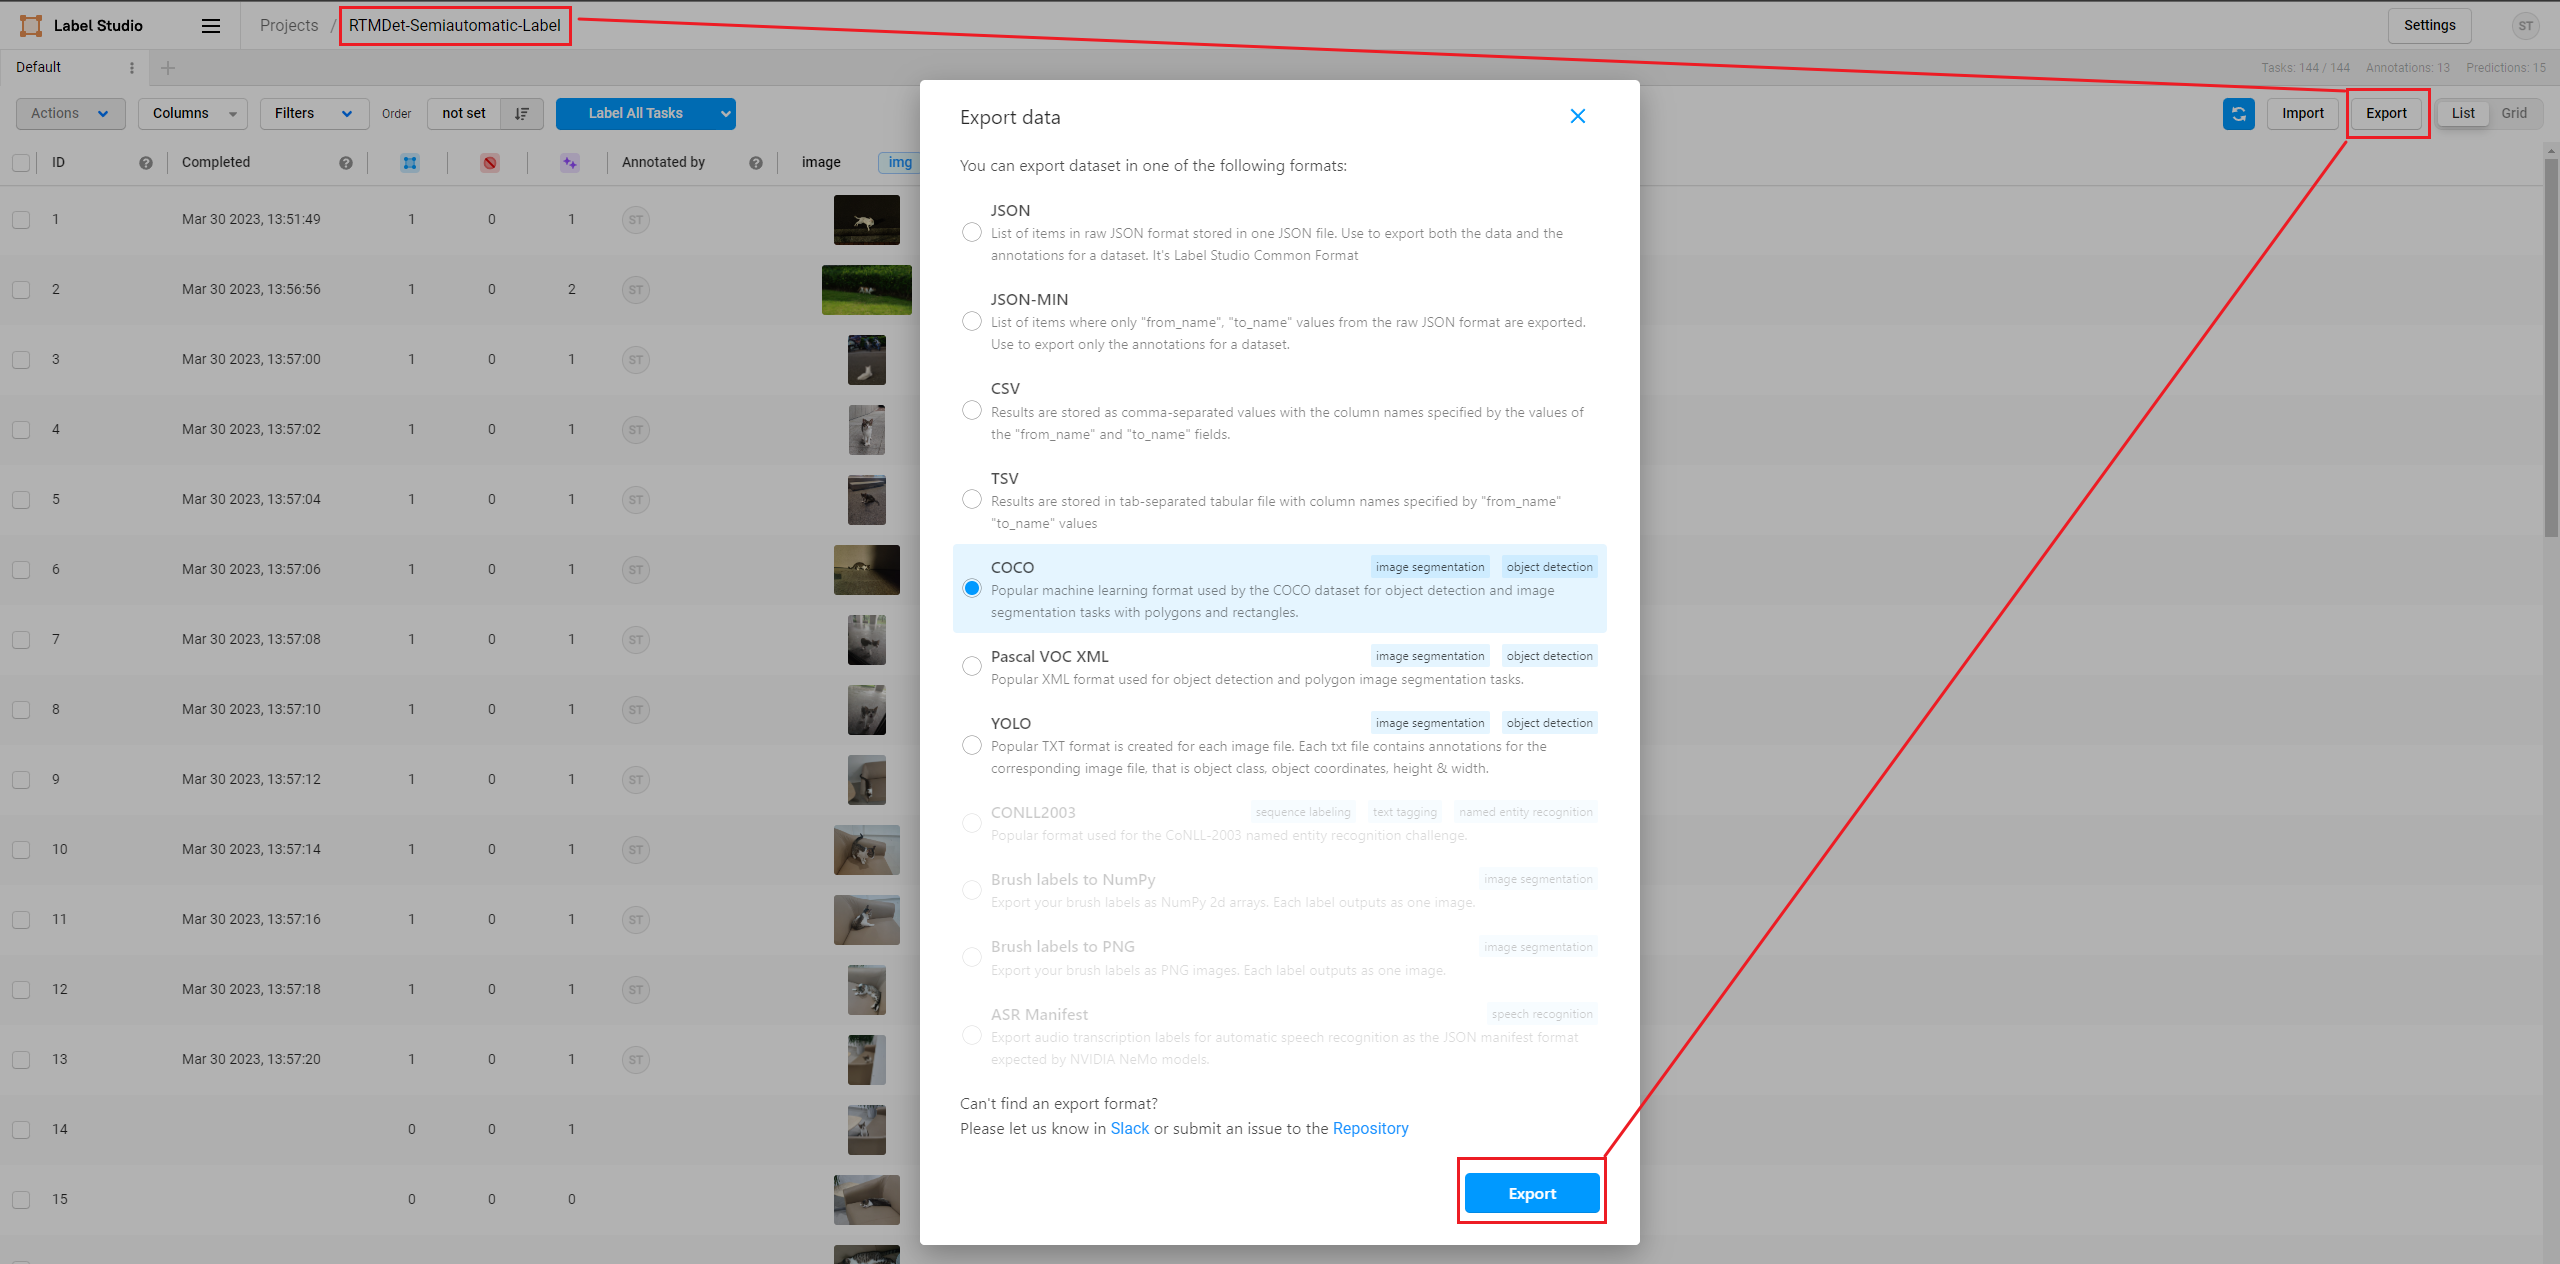 | |
| Use VS Code to open the unzipped folder to see the labeled dataset, which includes the images and the annotation files in JSON format. | |
| 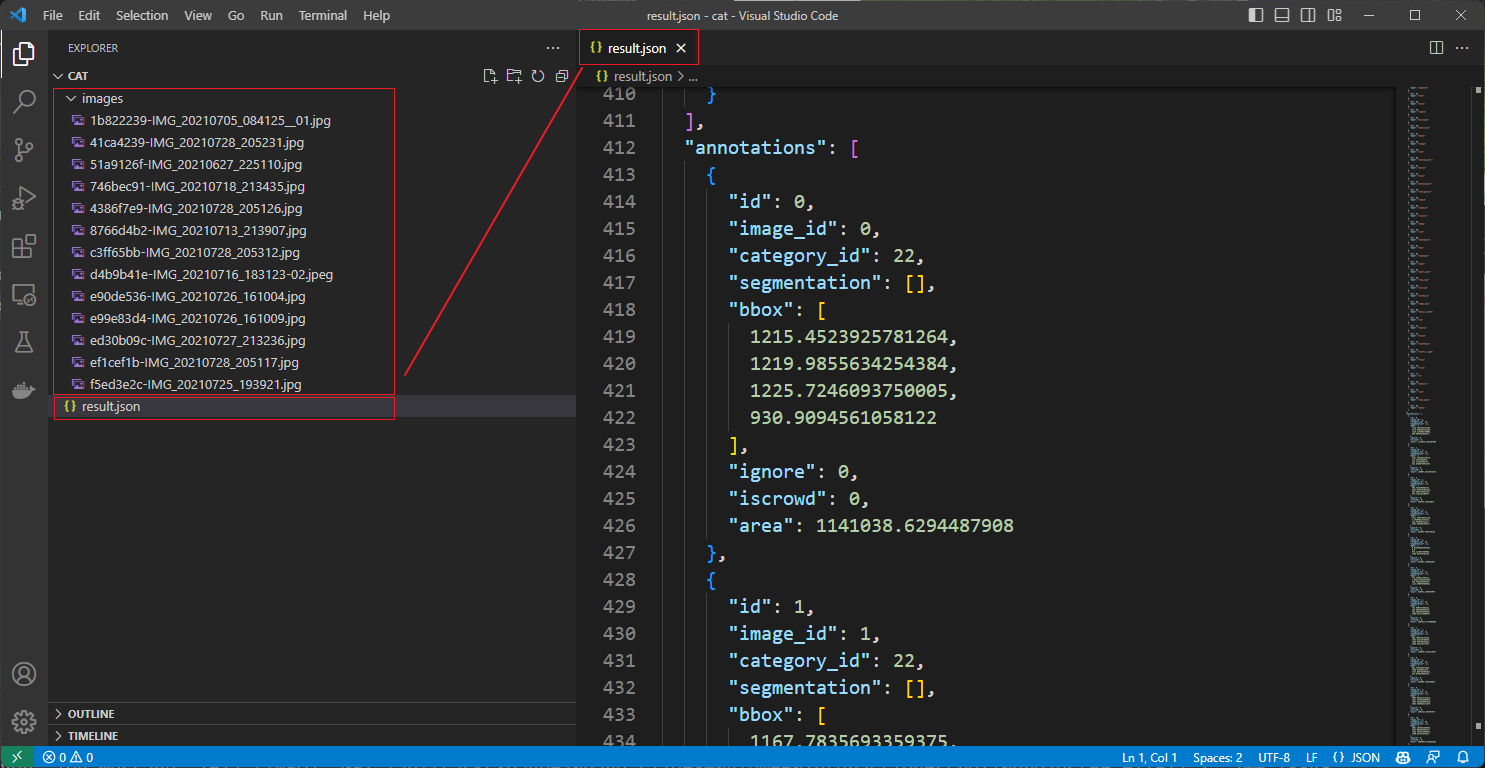 | |
| At this point, the semi-automatic labeling is complete. We can use this dataset to train a more accurate model in MMDetection and then continue semi-automatic labeling on newly collected images with this model. This way, we can iteratively expand the high-quality dataset and improve the accuracy of the model. | |
| ## Use MMYOLO as the Backend Inference Service | |
| If you want to use Label-Studio in MMYOLO, you can refer to replacing the config_file and checkpoint_file with the configuration file and weight file of MMYOLO when starting the backend inference service. | |
| ```shell | |
| cd path/to/mmetection | |
| label-studio-ml start projects/LabelStudio/backend_template --with \ | |
| config_file= path/to/mmyolo_config.py \ | |
| checkpoint_file= path/to/mmyolo_weights.pth \ | |
| device=cpu \ | |
| --port 8003 | |
| # device=cpu is for using CPU inference. If using GPU inference, replace cpu with cuda:0. | |
| ``` | |
| Rotation object detection and instance segmentation are still under development, please stay tuned. | |